Showing posts with label summer card. Show all posts

Thursday, June 11, 2026

More Waterside Cards, Please

After making the three cards from the last post using Waterside Retreat designer papers, I just couldn't stop using the beautiful papers to make more cards.  The beautiful images were calling to me from my stamping room (Craft room #1).  

For this card, I started with Pebbled Path cardstock and added the dock scene to my card along with some cut out oars and life jacket.  For embellishment, I put a small banner and button on the top and added a srtip of Just Jade fancy cut out that was sitting on my desk.  

The little seagulls are stamped in the sky to make the scene come alive.  This card can be used for birthday, Father's Day or any special day that you feel like sending someone a card.

The next card is a trip to the ice cream shop along the boardwalk.  Sit for a bit sipping some coffee and enjoying your ice cream.  The Relaxing Waterside coordinating stamp set has the chair and cup image in it that I fussy cut and added to the card.   I put another small banner and the loose anchor trinket to the top of the card.  Copper Clay is the background cardstock and it just ties right in with the ice cream sign.

The next card takes you back to the cabin along with an Adirondack chair and some oar and life jacket cut outs.  I embossed Happy Birthday in white powders and added some late afternoon seagulls to the sky.  

What an amazing set of products to work with!  I just want to make more.  :)


Saturday, July 26, 2025

Let's Set Sail

For my summer stamping classes I wanted to make cards using summer themes.  So for this class, I made sailboat cards for a "Day at the lake." 

We used the stamp set and punch called Let's Set Sail.  The punch coordinates with the sailboat but honestly, they could have designed it better.  You have to punch each sail and mast separately when it would have been so easy to just make the stamps all in one image to punch easier.

For this first card, we stamped the water several times and then brushed some light blue into the sky using ink and the brushes.  This gave the sky a little bit of color so that the clouds show up better.  I used the cloud dies from Give it a Whirl.  

I got the idea for this card from Karen Ksenzahovic.


This next sailboat card gives you the feeling of sailing off into the sunset!  I used some cut out designer papers for the circular sunset focal point.  The addition of the birds makes it look like a real summer night sky.

For some reason, my sailboats always seem to be blue.  I love the breezy feel that this card has.  You could send it for any occasion.


For this pretty red card, I used watercolor crayons for the sea and sky.  Then I stamped the sailboat shadow, birds and saying right onto the white panel.

I added a steering wheel from another sailboat set, even though sailboats don't have steering wheels.  LOL

This card has a very nautical look to it.  


This is the exact same card, only I used a different designer paper for the background.  I often give alternative card options for my stamping ladies.  

I loved using this fun sailboat set, even if the punch doesn't line up easily!  These cards can be used for both women and men, adding to my stash of masculine cards.  

I hope you enjoyed sailing along with me today.  :)


Monday, September 12, 2016

But It's Still Summer!

Today I'm supposed to be working on coming up with some Christmas cards and projects for my next stamping class.  I just have such a hard time making holiday things months before the holidays are here!  I'm still wanting to enjoy the last bits of summer and early fall. 

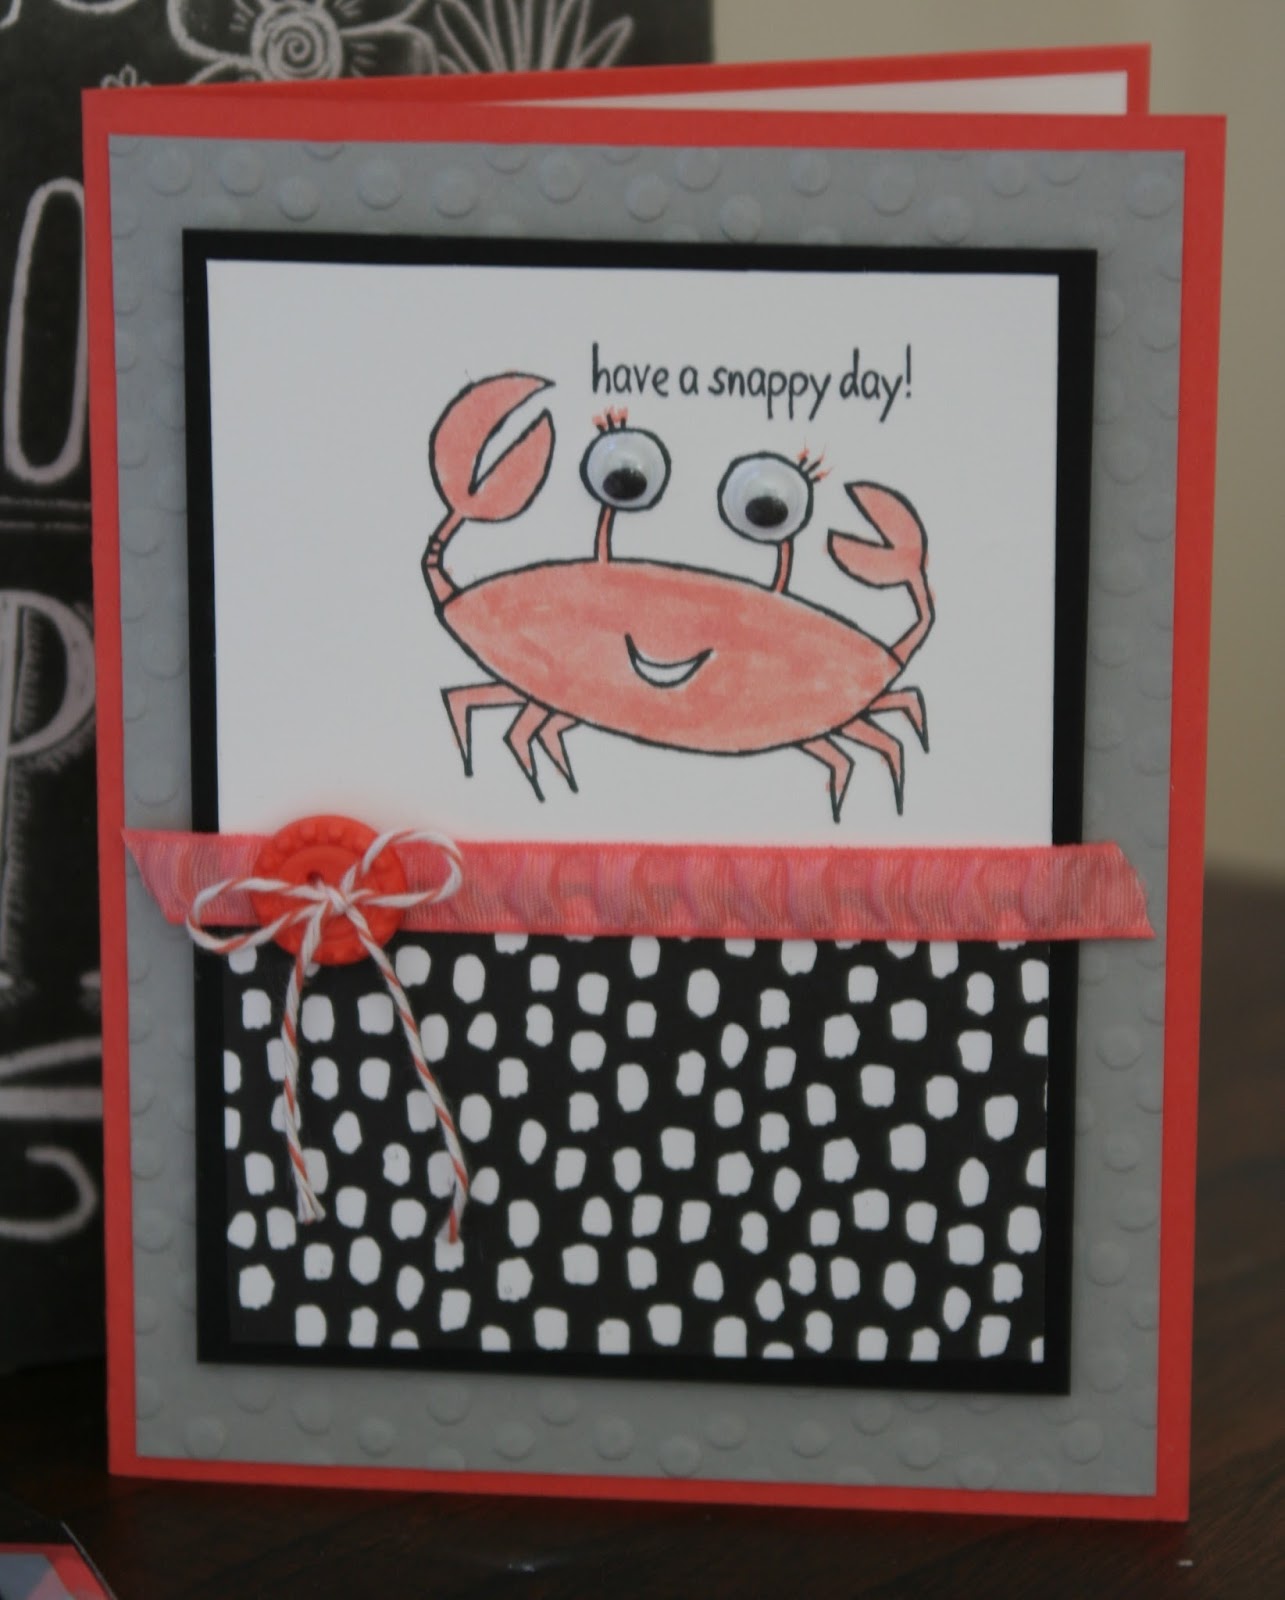
While looking for ideas on Pinterest, I came across this little guy who caught my eye!  I just got back from a weekend at the lake and wanted to still make something "summery."  He came out so cute, that I made a whole batch of the little guys.  What a fun set - You're Sublime; it has cute single images in it.  I think the "googly eyes" made him come alive!  I used the Everyday Chic designer paper for the bottom portion - got the idea from Connie Babbert. 

Do you ever have a hard time making projects out of season?  Let me know what your secrets are for getting in the holiday "spirit" during August and September.

Tuesday, August 27, 2013

Pretty Pear Pizazz Projects

I have to admit, I have a hard keeping track of what colors are still current in the Stampin Up catalog!  They change them so often and bring colors in and out all the time.

One of my favorite colors is Pear Pizazz.  I'm glad that it found its way back into the current color collection.  I made this card using Summer Silhouettes stamp set and the the Petite Purse die cut.  I used rhinestone on the leaf image to make it sparkle just a bit.  It just added the right touch.  The designer papers are from the Gingham Garden collection.  I copied the card idea from Vicki Burdick.   

To make the little purse favor (we put some Hershey's kisses in there) I cut out the purse in the Pear, then ran it through the Big Shot using the Fancy Fan folder.  The whole piece doesn't exactly fit in the folder, but don't worry about that.  Just emboss most of the cut out.

I used the new Strawberry Slush ribbon and because it is gathered, it fits nicely around the top edge of the purse.  Then I used two pieces of designer paper to cut out the "top" part of the purse.  I glued one to the top edge and one to the underside to cover up the edges of the ribbon.  I glued a strip of matching ribbon to the paper handle to make it a little fancier.  Then I adorned the purse with a butterfly cut out and some rhinestone jewels.