Showing posts with label tote bag. Show all posts

Saturday, September 14, 2024

Woodland Grocery Tote Bag

My quilt guild meets for the months Sept to June.  Six of those months are in-person meetings and I make a homemade project to be raffled off for each of those months.  This year for September I made another Grocery/Tote bag using a woodland print that I got at Joann's.  I love the forest animals and the soft colors in the print.  

I used indoor-outdoor fabrics and put a piece of fleece between the top fabric and the linings.  This makes the bag a bit stiffer so that it can stand up, but not too think so that you can fold it.

I made the front and lining pieces and quilted them together and then assembled.  I use a zig-zag overcast stitch to cover the edges of the seams and to finish them off inside the bag.

The handles have webbing in them to keep them sturdy through a lot of use.  

The large buttons are from Stampin Up from a few years back.  They make a great embellishment to the front of the bag.  

When I was making this bag, I cut out for two bags, but haven't finished the second one yet.  I want to make another one for myself.  :)


Monday, March 11, 2024

Handmade Tote/Grocery Bags


 About a year ago, I picked up some indoor-outdoor fabrics from Joann's.  I had this great idea that I was going to make my own bags to take to the grocery store.  So I bought a lot of various fabrics for both the outside and the linings of the bags, yards of fusible fleece and interfacing for the inside lining, and many yards of handle webbing for the handles.  When I added up the total, I think each bag would cost about $50 to make!

But being a crafter, why buy bags from the store that cost $1-$2 when you can make them for $50, right?

So this week I drew up a pattern and began working on my bags.  I didn't want to make them too big or too small, and I fussed with the dimensions.  All in all, I like the size that they turned out.  

On this first bag, which is sort of a prototype, I didn't quilt either the bag or the lining.  Although I like the overall look of it, it seems a bit flimsy to me, or I call it too loosey-goosey for a tote.  

So I went back to the sewing table and made another one, this time with a quilted top and inside.

This bag turned out much stiffer and held its shape better, so I think I like this one with the quilting on it more than the first one.

I wanted to add some buttons to the bag, so I picked out some old Stampin Up buttons.  Luckily I have a few packs of those lying around and ready to be used on a project.  

For my next bag, I may add some pockets either to the outside or the inside to give it even more shape.  I'm still working on the perfect pattern.  :)

While out on my travels I found some plastic canvas that I thought would be great for the bottom of the bag to keep it square.  Now if I can just find where I put it, I'll add that to the inside, covered with the leftover fabric scraps.

I'll keep you posted on the bag making project!


Saturday, December 3, 2022

Patchwork Tote Bag & Christmas Miniature in a Mug


One of my craft-loving friends, Cindy, is going to be moving to TN in a few weeks.  Cindy and I have gotten together to make crafts for several years now.  She is the Crafting Queen and knows how to make all kinds of crafts.  

For her going-away party, I wanted to give her something handmade.  So I did some embroidery and made her this sweet little tote bag with a gathered top.  The bag will make a nice little carrier for taking a small craft project along with you when you are out and about with some time to spare.  I got the pattern from an older book that I have called Patchwork Love Embroidery by Gail Pan.  

Cindy just loved her tote bag. She likes vintage items and muted country colors in her projects and in her home.

 I gave it to her at one of her crafting days that she holds at her church once a month.  


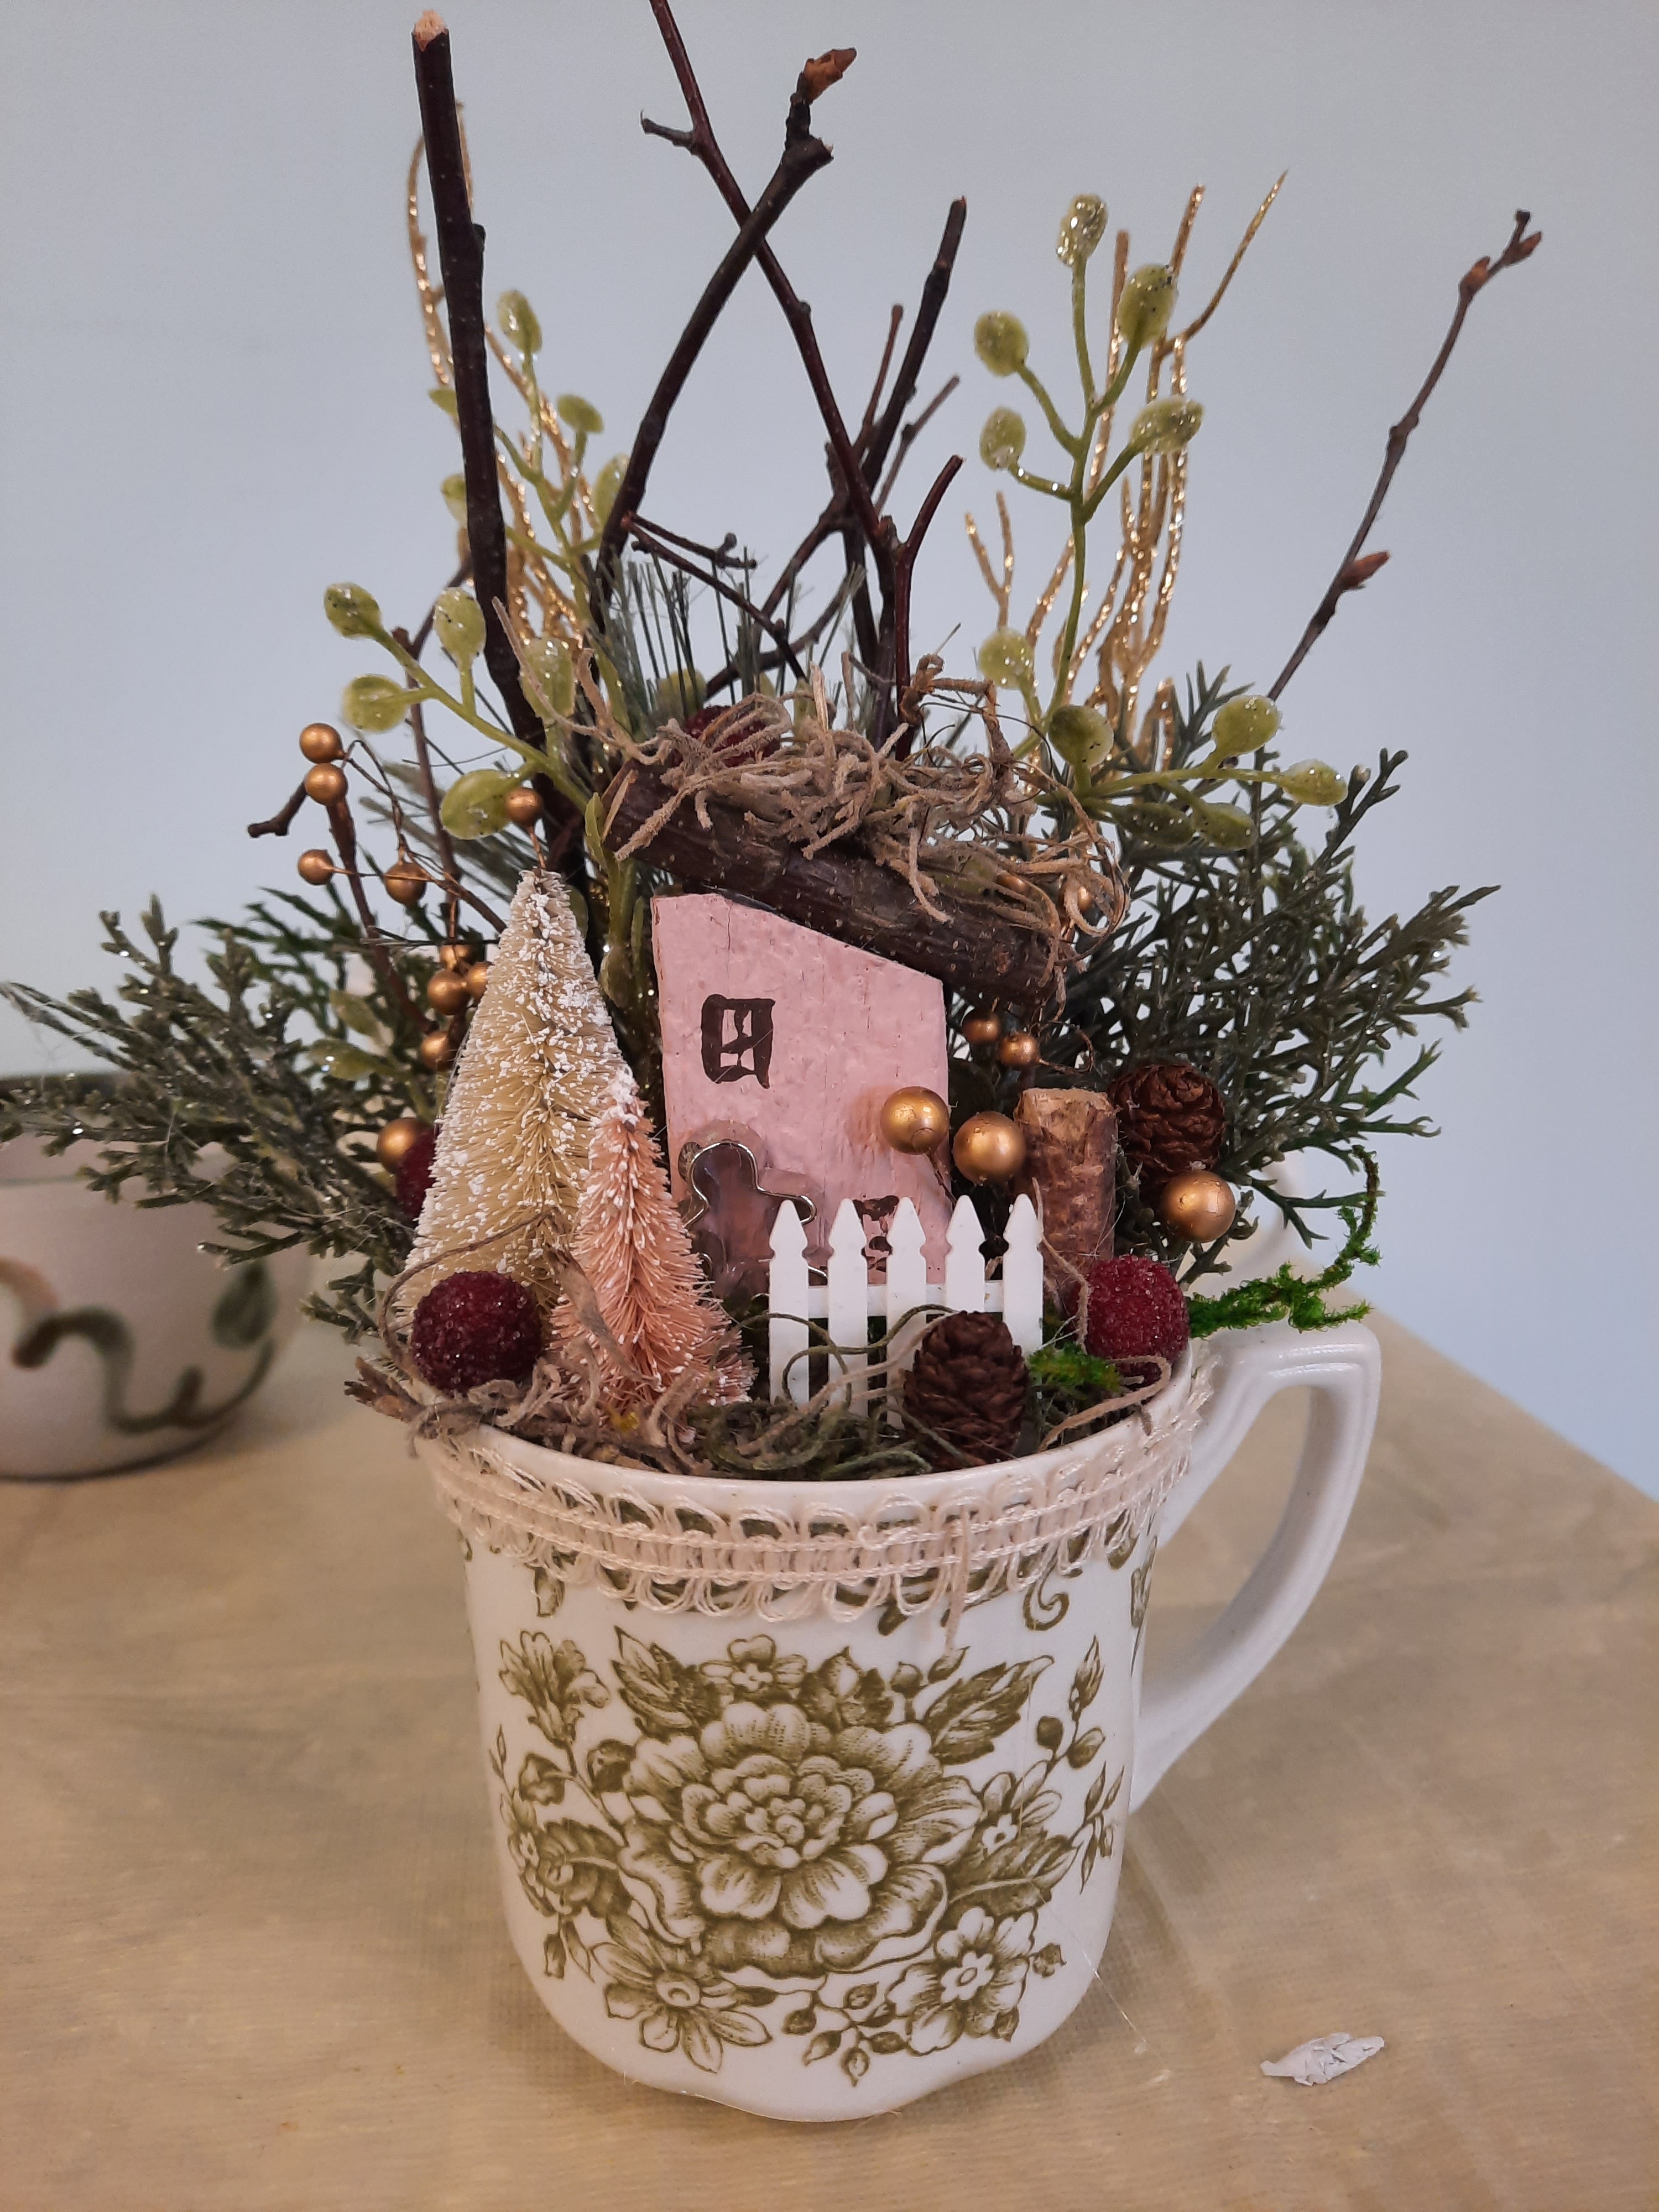
This month we made a sweet festive decoration using a mug and some greenery items.  Here is a photo of the one that I made.  

I added a little house that I painted and a small white picket fence.  I love how it came out.  It only makes me want to make like 20 more of these.  

Although the mugs came out lovely, we made a lot of mess while we were working on them!  There is styrofoam in the cup to hold the twigs and moss.  The rest of the items are glued in using a glue gun.  Depending on the mug that you choose and what you have to put in them, the projects can come out quite differently from the one that I made.

It would be fun to collect some new miniature items from thrift stores to put in my next mug.  :)

Here is another photo of my project. I already have it out on display with my Christmas decorations.  I just love how it turned out.  

Thanks for the idea, Cindy.  Next trip, off to TN to visit Cindy and what sort of thrift and craft shops she will have in her new town.  


Monday, November 23, 2015

Mini Totes and More

A few years ago I saw the idea to make little tote bags in one of my Quilts and More crafting magazines.  While I was over at Walmart and "just walking by" the craft section, I spotted some beautiful fall fabric.  Of course, I had to stop and take a second look at it.  They are selling Waverly canvas fabrics for $3.97 per yard!  That is crazy!  So crazy, that I had to buy some.  So I picked out some fall colors and came home and whipped up these little tote bags.  :)

I did put some thick interfacing in them so that they would stand up on their own.  They're great for giving a little gift; you can put a card in there and some candies, a Thankful for You magnet or whatever else you choose.  So I made them for a craft fair that I was in.

One of the things that I love to do is go to flea markets and garage sales.  This past summer I picked up these cute little brown frames and they have been sitting on my craft desk waiting for something to go in them.  They're only an inch wide, so I had to find a little stamp that would fit in them. 


I've made these Reese's Thanksgiving favors before, but they are easy and quick to make.  Using 2 bags of Resse's peanut candies, I made 42 party favors.   I'll be giving these out on Thanksgiving Day, for sure. 
What things are you making this year for your fall crafting or Thanksgiving table?

Saturday, June 20, 2015

Cute Tote with Cards

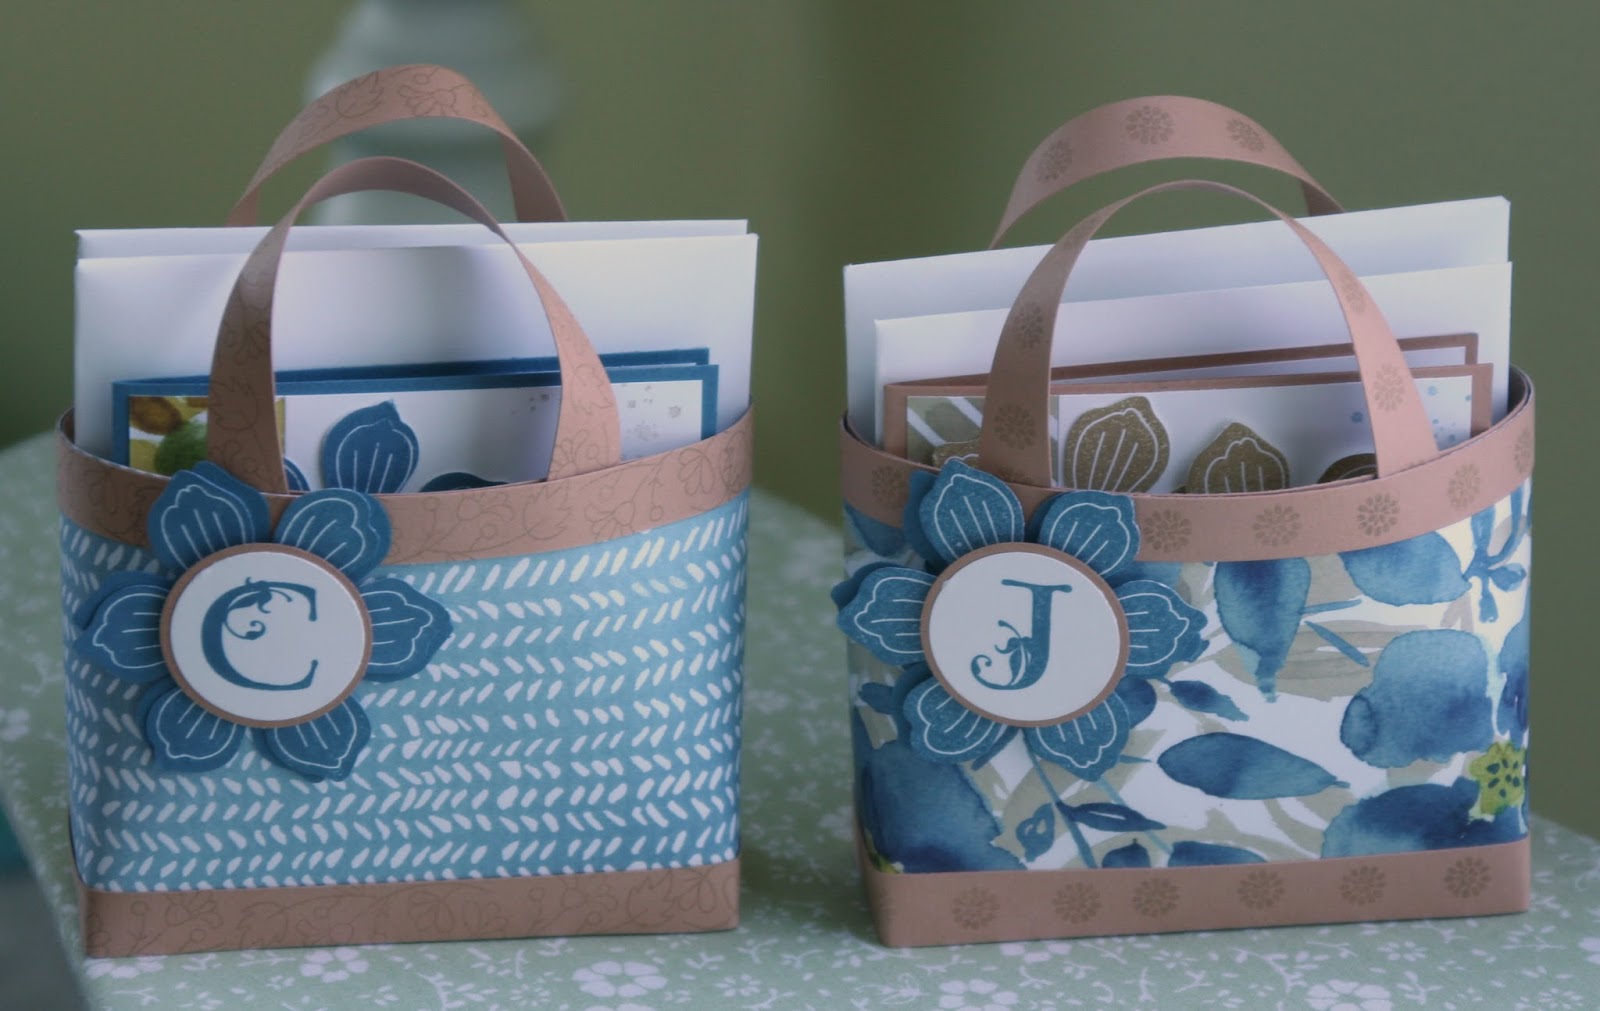
I was browsing around on Pinterest the other day and came across this adorable little tote with matching note cards in it.  I just knew that I would have to make it!  The totes are made with the new English Garden designer paper.  They are not hard to make at all.  If I had more time, I would have made LOTS more using these pretty papers.

 Here are the cards that I made to match the first tote bag. I used the Bloom for You stamp with the coordinating Fun Flower punch for quick and easy flower accents.  Using the envelope punch board, I made matching 4 x 4" envelopes, too. They are a fun project to work on and a nice little gift to give to someone special. 

By the time I got to the second tote bag, I decided that the note cards didn't need two flowers to make them look pretty, so I only added one flower to each of the cards in this set. 

We made these totes with the cards sets in my last stamping class and everyone enjoyed making them!  Here is the link to the video pattern if you'd like to make one, too.  Let me know how your totes come out. 


Thursday, April 10, 2014

What Do I Do With the Cute Girl in the Fabric Panel?

This past weekend while I was at a Quilt Show in my area, I found this cute fabric with drawings on it by Cori Dantini.  I immediately recognized the artwork because I have a date book with some of her artwork in it.  Her images are just so sweet- I love their whimsical look!

Of course, I just had to buy it!  I bought a few coordinating fabrics to go along with it.  (I had to get those, too!)   I'm not exactly sure what to do with the panels, but I'm sure that I will figure that out!

Today I wanted to make a tote bag to bring to my sewing group at church.  All of the members are making and donating tote bags for children that need to go into the foster care system.  So I decided to make pockets out of two of the panels for the front and back of the tote bag.  I just love how it came out!

I had the striped blue and the checked yellow fabric already, but I really like how they bring out the colors that are in the panel.  I'm sure some little girl would love to have this to bring to her new foster home.

Here is a pic of the other side of the bag.  The images in real life are a lot brighter than what the picture shows.  I think the girl in this panel is working on some embroidery!

Well, I've used up two of the panels.  What other things can I make with these fabric panels?  I'm open for ideas.  :)

Monday, September 23, 2013

Quilts for the Nieces


This past year I have been working on throw quilts for my nieces that live in Virginia.  Here is one that I finished for my oldest niece.  I also made her a little tote bag and a table topper mini quilt to match.

I try to stick to simple patterns so that I can actually finish my projects!  Ha ha!  This pink and teal fabric has cute girlie designs on it.  I used a basic block design with a sashing.  I added the black squares for contrast.  Once I put the top of the quilt together, I thought that it was too plain, so I added some 9-patch blocks in the borer and some assorted squares in the top border to add some interest. 

Here's a close-up photo:


This is the quilt that I made for my next older niece:


It was my one of my first attempts at appliqueing pieces onto a square.  Sewing all of those flower petals on took me a LOT longer than I thought it would!  (A lot longer!)  The nice thing with the applique is that I could bring the squares with me and work on them while I was waiting during my appointment times.


I had a lot of fun working with the different bright pink fabrics and definitely ended up with may too much fabric when I was done! (I could make 10 more pink quilts with all of the fabrics that I ended up buying! But, shh- don't tell anyone!)  At the end I added some lime green in the center of the flowers and in the sashing rows to add some contrasting color.

I am still working on one more quilt for my next younger niece.  Hopefully I can finish it soon before she outgrows the fabric designs!

Tuesday, July 2, 2013

Easy-to-Make Tote Bag


I made this medium-sized tote bag today and am posting another tutorial!  They are so quick and easy to make!  It even has a small pocket on the outside of both the front and the back (hard to see in the photo).  It measures 13" x 9" x 3".  This one will hold several skeins of yarn or sewing materials to tote your project with you to work on when you go out.   (Or whatever you'd like!)

I made this bag using upholstery fabrics- fabrics that are a little thicker than cotton, to give it some thickness and weight to it.  I doubled the fabric for the bag to create a simple lining.  Check out the tutorial tab at the top of my home page and make one today!  (I also posted the changes to make a larger bag if you'd like!)