Tuesday, September 19, 2023

The Tilda Collection

For the past couple of weeks I have been playing around using some of my Tilda fabrics.  I wanted to make a gift for one of my sewing friends for her birthday because I know that she loves fabric from the Tilda lines.  

I started out making some needlepoint cases and fussy cutting the ladies from one of my fabric pieces for the front of the case.  The back is patchwork and inside is some wool felt with embellishments on it.  I made four of them and love how they came out!  I saw the idea for these online.

Next I made some patchwork pincushions to match.  I had to order some purple buttons to complete all of the projects.  I like how they add to the cuteness factor.

After finishing them, I sewed some small zippered bags in the beautiful Tilda fabrics.  I added a small charm to the zipper pull and a little tab on them.  

Of course, I couldn't leave out the little birdies!  My friend has a whole collection of them and I knew that she would like one in the Tilda fabrics.  :)


I found a flower pattern on the internet and made some mug rugs to go with the collection.  You can drink your tea and while sewing and there's room for a cookie, too!  Or you can just dress up a table or shelf with them.

After the flowers, I put together some key fobs.  These are great for keys or anything that you can put on a ring.  I have some applique circles that I added to mine so that I don't lose them.  


Lastly, I made a couple of cards to match the set.  I gave one set to my friend Carol and raffled off a second set at my quilt guild.  The ladies there loved them, too!  

What do you think of my Tilda collection for sewing?  


Friday, September 8, 2023

Basket of Kitties

Don't you just love these little kitties?  They are a panel that I bought a couple of years ago called Woof, Woof, Meow cat panel by Stacy Iest Hsu.  There is another adult cat that I still have to make.  The set comes with the 4 kittens.  

I started making these kitties a year ago or so (ha ha) and found them in my sewing room.  Today I put together a small quilt for them to cuddle up with and hope to set them out for my granddaughter to play with.

I have a puppy dog panel and a second kitty panel to still complete.  I'm hoping by the time that I'm done that the whole basket is filled with cats and dogs galore!

The adult cats have a pouch to put the kittens in, but I think it needs extra fabric and a dart to make the pouch fit any of the babies.  You can see in the photo that the pouch is very tight.  

I will try something different for the next adult cat.  We'll see how it comes out.

I'll keep you posted on the progress.  


\
What do you think of the kitty family?  Do you have a little one that would like to play with them?


Friday, September 1, 2023

Mixing Old with New

Today I took out the old stamp set, Time with You.  It has cute vintage images on it from 2006.  And check out the saying, "On the open road of life, may happiness be your destination."  Sweet, right?

 Although I made this card a couple of months ago, I loved the vintage look of the girl mixed with the look of the Regency Park papers, and wanted to make more.  :)

For the cards, I used some various sayings and on this card, I chose another color of the designer papers.  I added some Wink of Stella to the girl to give her some shine.  You can't see it in the photo, but she sparkles as she's riding her bike!

I have a lot, a really lot, of the Regency Park papers left over from the spring catalog, so you may see more things made with it!  Stampin Up is running the mini catalogs for only 4 months now instead of 6 months and I just don't get time to use up all of the products.  I hope they go back to 6 months next year!

These girls look like they are riding their bikes on the road to happiness.  :)


Friday, August 25, 2023

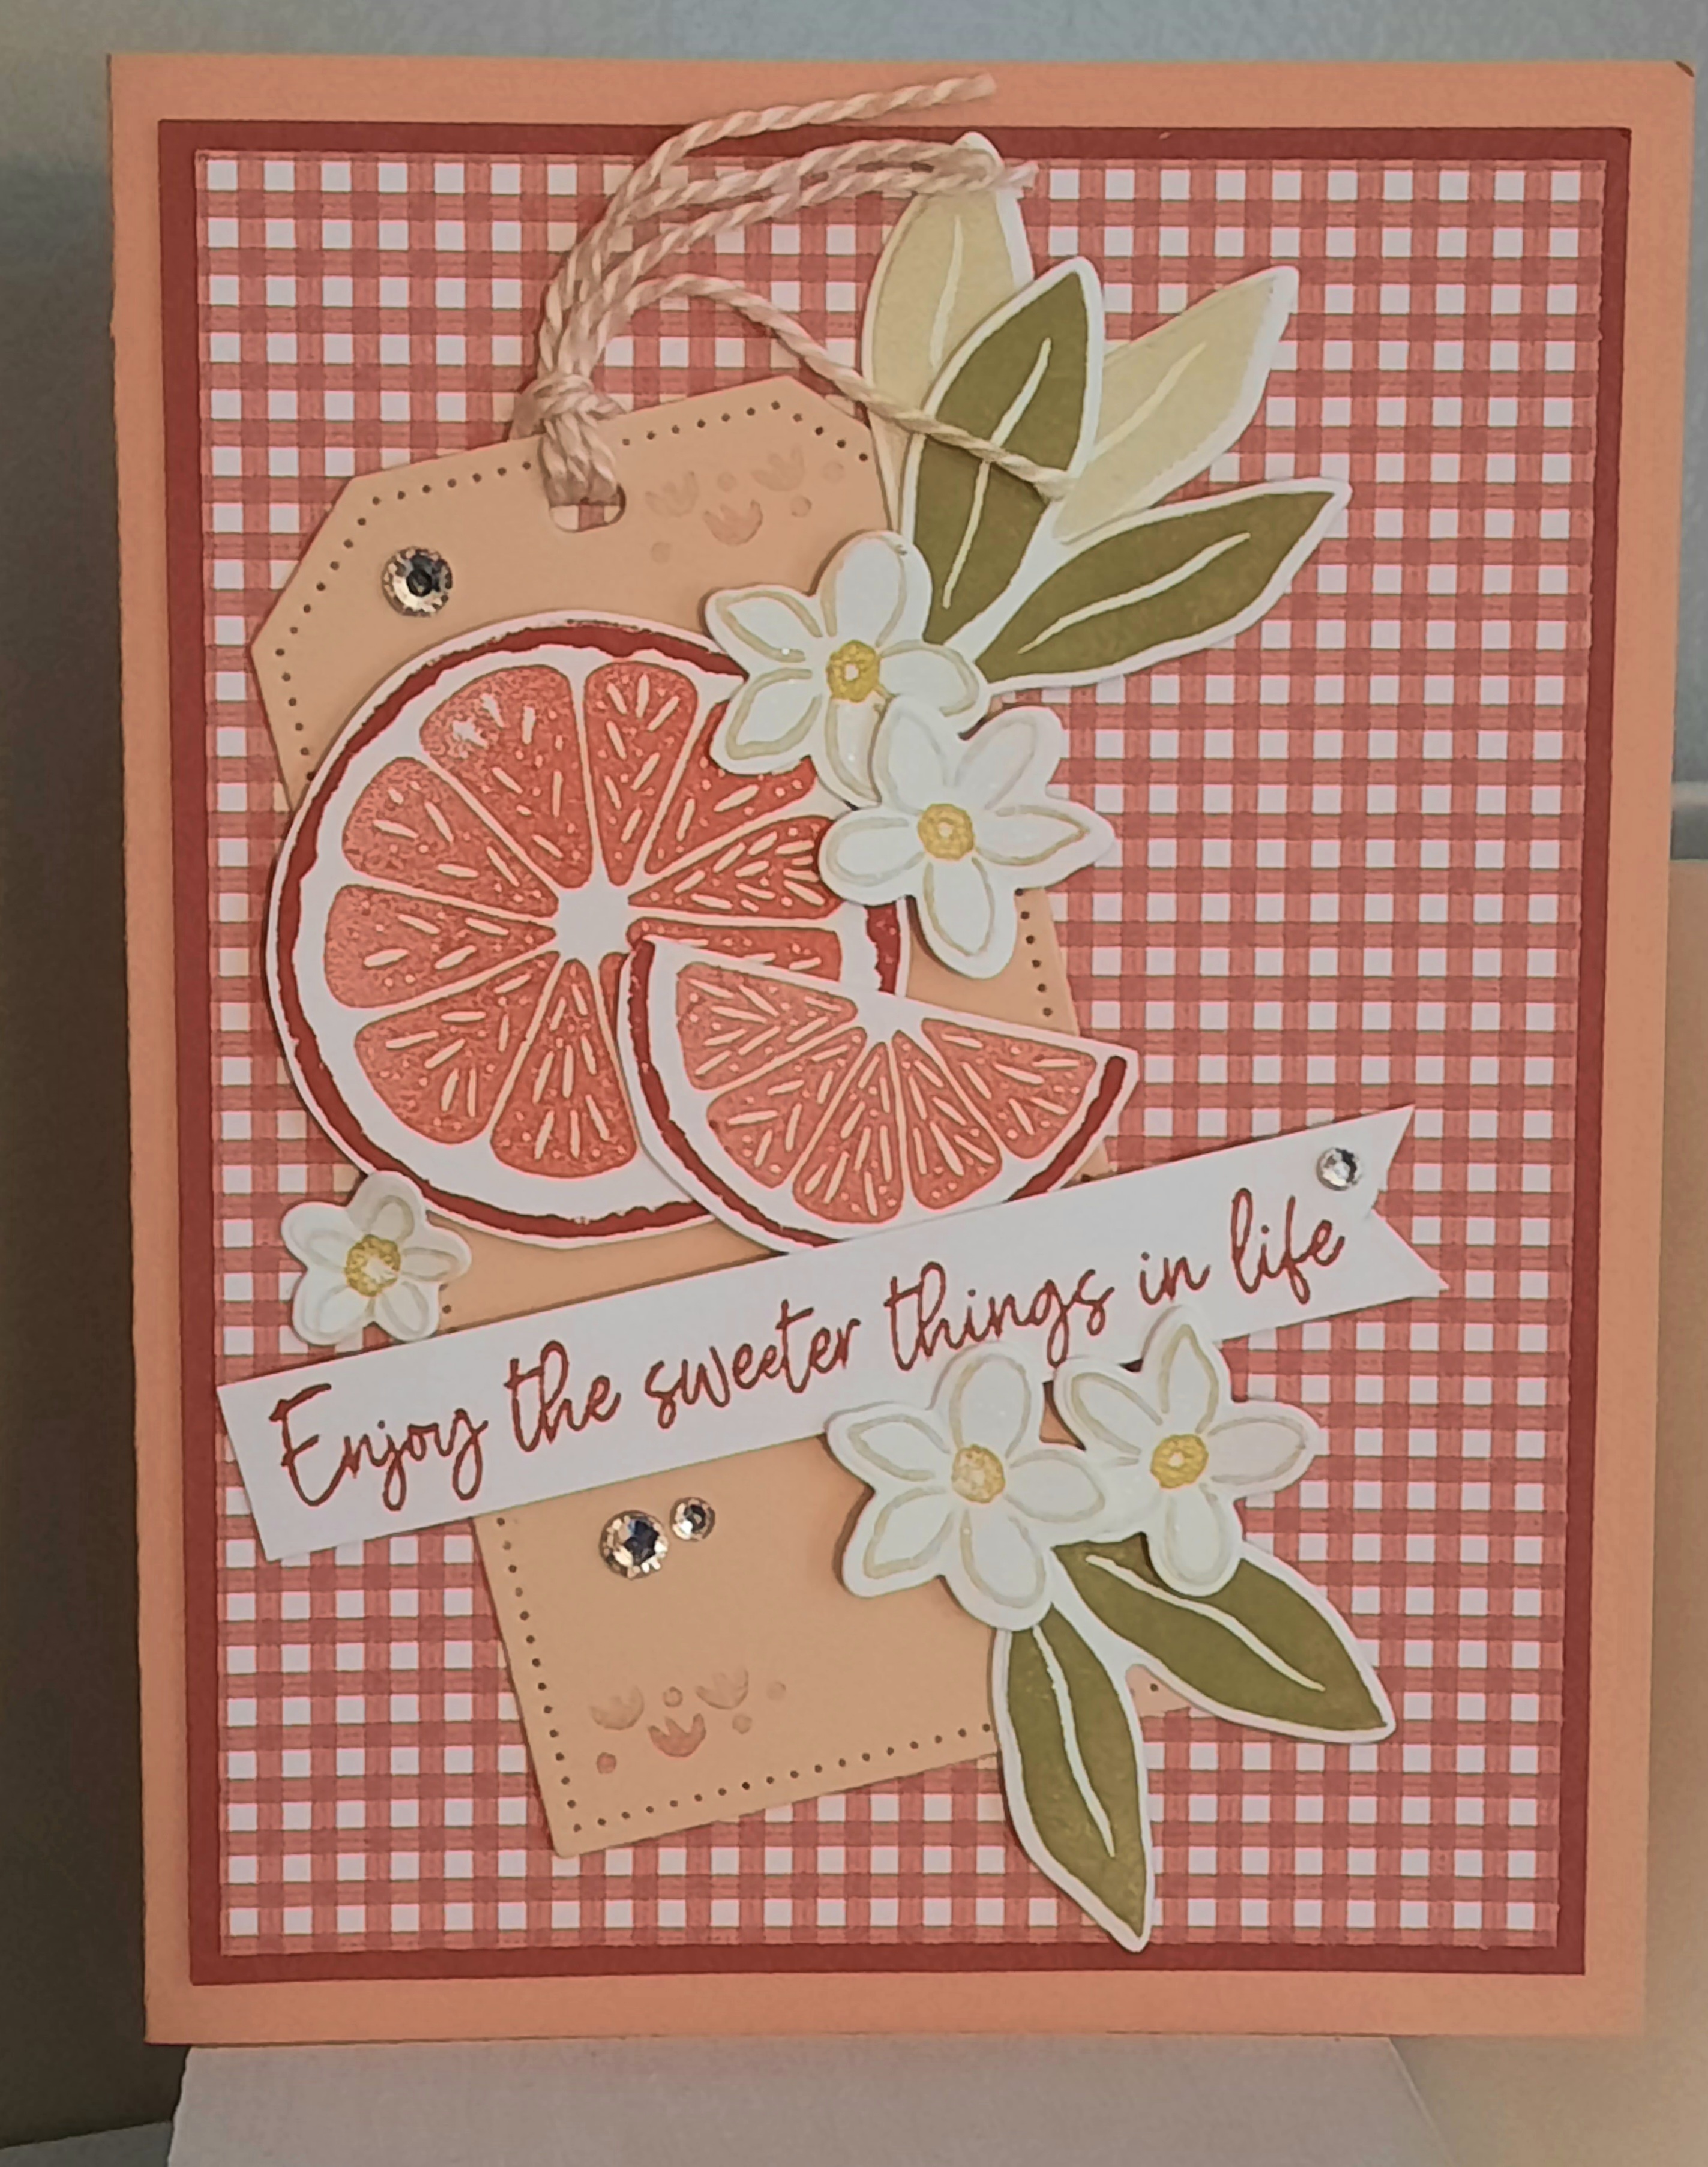
Sweet Cirtus


 For my Stamping Class this week, I chose to use the Sweet Citrus stamp set and die cuts.  I like how the stamped images can be used to make oranges, lemons, limes, grapefruit and even coconuts!  

The fruits on my first card are supposed to look like Ruby Red grapefruits.  The tag is from Tailored Tags and to that I added the citrus images, some leaves and a few flowers.  

The photo looks a bit bleached out, but the card is really very colorful and bright.  Just so cute.  

Card #2 is an easy fancy fold card.  I started out with Lemon Lime cardstock and found some older gingham papers to match for the front of the card.

I used the Scalloped Contour dies for the focal point and then added some lime slices, leaves and flowers from the stamp set.  I stamped the saying, "Sending you a big squeeze" onto the white panel.

I like to embellish with rhinestones and for this card I found some old lemon lime flower accents that matched just perfectly with this card.  

It's another bright and easy card using the Sweet Citrus set.  :)


I got the idea for this Navy blue card from Yvonne Spikmans on Pinterest.  I love how different it is from what I usually tend to make!  I added a dry embossed piece of Navy blue cardstock to the front of the card and then white embossed the saying directly onto that.  Then I stamped and added more limes! Aren't they just so sweet?  (Get it - sweet?)   This time I stamped the little flowers in Navy blue and added the usual embellishments to complete the card. 

I love how it turned out.  The contrast of the Navy blue and the Lemon Lime colors really make the card pop.


 And last, but not least, I copied the coconut idea from Tami Hewlett from Pinterest.  First I embossed the white cardstock with the Citrus embossing folder and then sponged it with some teal ink.  I wanted it to have an ombre look to it, darker on one side and then getting lighter on the other.

For the white ribbon, I unraveled it a bit on the edges and then added the rinds of the citrus images.  I lightly painted the insides of the coconuts with a paintbrush.  I found that this technique worked better on glossy paper, so the fruit and flowers are stamped on that.

The green sprigs are from the Tropical Chic set that came out a few years ago.  

Are you loving the Sweet Citrus set after seeing my cards?  I loved using this set and thought that the images worked very well for my cards.  What do you think?  

To order the Sweet Citrus set, click here.  


Crafting with a Friend

Last week I went over to my friend Tracy's house to make some craft projects.  She has a beautiful craft room, with all of her supplies sorted, labeled and displayed - unlike mine, which is just sort of a mess!

We decided to start with these little tobacco baskets from Hobby Lobby.  They were already painted and we left them white. Then I painted some soft colors onto a wooden tag and small wooden bird.  I embellished them with some stamping and added a couple of pretty flowers to them.  

I added two gold sprigs to the basket to start and then added some greenery to fill in.  I finished it off by gluing in some pretty flowers.  

I'm happy with how it turned out.  Maybe Tracy will come to my house and help me decorate my crafting room.  If she does, this little bird basket would make a nice accent.  


Monday, August 14, 2023

More Countryside Inn


 Don't you love the Countryside Inn papers from Stampin' Up?  Here is another card that I made using them.  

For this card, I used thick white cardstock for the base, added a panel of Night of Navy and then added the pretty designer paper to complete the background.  I used the Framed Florets die cuts for the oval and Stitched Shapes for the white focal point.  The saying is from Layering Leaves as well as the sprigs and the flowers are punched from Petal Park.

When I made the cards, I tried to use different sayings, all from Layering Leaves stamp set.  


Each one looks a little different, but I love the soft sweet look of these papers.  And yes, it does remind me of what the wallpaper might look like if I was staying at the "Countryside Inn."  


Quiet Meadow meets Countryside Inn

For my next card using the Countryside Inn papers (aren't they just beautiful?) I made a fancy fold card, folding back the top layer of the cardstock and adding strips from the designer papers.  

Using thick cardstock, I cut three different flowers from the Meadow cut outs.  I sponged them using Boho Blue, Misty Moonlight and Night of Navy inks to give them some different shades of color.  I got the idea for this from Gail Ellis.  


For two of the cards, I used the little tag from the Meadow dies and stamped the Love saying from the Quiet Meadow stamp set.  For the third card, I used a With Sympathy saying from an older set that fit perfectly into the saying frame from the Meadow dies.  


I made some Post-It-Note holders with the left-over paper from the Countryside Inn and used the Courage & Faith stamp set for the sayings and Petal Park flowers and punch set for the flowers.  

I put them on a small tray and let my stampers each choose one for their desk.  Cute, right?  

If you'd like to order this beautiful paper for your crafting projects, click on the link here to get to Stampin' Up to purchase.