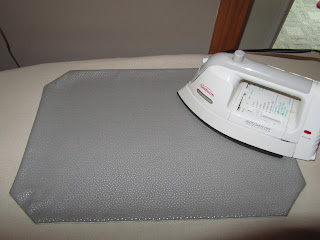
Brighten up your kitchen or dining room with this easy-to-make weekend project! Finished size is approx: 12" x 18."
Note: I like to use home decorating fabrics that are heavier than regular cottons. They hold up a lot longer than regular cottons. If you are using decor fabric, you won't need any batting. In these photos I am using regular cotton so I picked out a thin batting to put inside.
To make 4 placemats, you will need:
(2) half yard cuts of fabric
1 yard of very thin batting (I use the kind that you buy near the interfacing on a bolt.)
matching thread
ruler
scissors
pins, needle and thread
cutting board and rotary cutter (optional)
sewing machine
basic sewing knowledge
Here are the fabrics that I picked to make my placemats along with the batting:
1. Cut 4 pieces of your main color fabric 13" x 19". You can use a rotary cutter or make a pattern and cut out your fabric pieces. These are the front of your four placemats.
2. Next, make a pattern from a piece of paper 2" x 2" square. Now cut it in half on the diagonal.
3. Layer the four main pieces together and place the triangle pattern on each corner and cut of the edge off all four corners of your main fabric. This will give you the shape of your placemat.
4. To sew each placemat, layer the batting first, then the backing fabic right side up, then the main fabric right side down. I loosely cut out the backing fabric in a rectangle slightly larger than the main fabric piece. You don't have to cut this fabric to the exact size. We will trim it later after sewing.
5. Now you are ready to sew. Starting on the short edge, begin sewing and sew all the way around with 1/4" seam, using your main fabric edge as a guide. Leave a 3" hole open for turning.6. Using a rotary cutter or scissors, trim the edge of your placemat close to your stitching, leaving about 1/4" or slightly smaller distance from your seams.
7. Trim the diagonal corner and make a small clip on the corners using the scissors, being careful not to cut too close to the seams!
8. Turn the placemat right sides out using the 3" hole that you left open on the side.
9. Being very careful not to poke a hole, gently push against the corner seams using a blunt object like a closed pair of scissors to make your corners lay flat.
10. Using an iron, press your placemat flat. Fold both the top and bottom edges in on the 3"opening.
11. With needle and thread, hand stitch the opening closed. Use a blind stitch (or applique stitch) so that the stitches don't show.
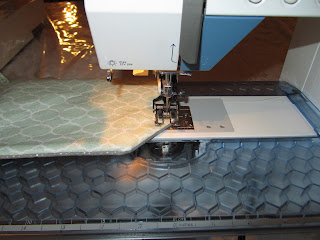
12. Using a sewing machine, topstitch along the edges of your placemat, about 1/4" from the edge. This gives it a nice finished look.
13. You are now finished with your placemats!
14. If you would like to machine quilt them, you can do that, too! I used a stipple stitch to finish mine. Enjoy!


No comments:
Post a Comment