Friday, February 25, 2022

A Friendly Hello

One of the free Sale-a-Bration stamp sets and papers that Stampin Up is offering during Jan and Feb is this sweet little bird.  The papers are pretty pastel colors and together they really do present a Friendly Hello!  For this card, I used Pale Papaya cardstock, and layered the designer papers onto it.  I teamed up the Friendly Hello papers with Beautifully Penned papers from last summer's Sale-a-Bration selection.

I love the contrast of the addition of the black and gray colors.

For this card, I used a fold-back style for the base, added the designer papers, and then added a focal point using a scalloped die from Stitched So Sweetly.  I embossed a rectangular piece to add to the scalloped white to give it more dimension.  

Then I stamped the flowers from Friendly Hello and added some sprigs that I had lying around (seriously).  The saying is cut from a die and then glued to a piece of black paper that I hand trimmed for the border.  There is Wink of Stella for a pretty shine on all of the cards, but it doesn't show up in the photos.  I got the idea for this card from Leena Girsa.


For my next bird card, I used a piece of the designer paper for the focal point from the Friendly Hello papers.  I embossed the background with Timeworn Type folder and used white embossing powders for the saying.  I colored in the flowers and the bird with the Stamping blends.  I saw this card idea from Tami Hewlett.  

For the last card, I cut up strips of the designer papers and put them onto a white piece of cardstock.  I ran the piece through the Emboss machine using the Subtle folder.  I love how it sort of melds all of the papers together.  The saying is from See the Good, an older set.  I used a punch for the black leaf accents.

I had fun using the Friendly Hello set with the papers.  I'd like to try the bird using some darker colors instead of the pastels.  What about you?  Do you like the bird?  What color would you like to see him with?


Sunday, February 20, 2022

Christmas Ornament Exchange

As you may know, every Christmas I host an annual Ornament Exchange party.  It's a fun time to get together with my crafty friends and celebrate the holidays.  Each person has to bring 8 homemade ornaments, all the same, for exchange.  They also bring appetizers, drinks and desserts and we have fun eating all of the goodies.  

This year my friend Tracy brought over a Hot Cocoa bar for us to enjoy.  It was fun setting it up and choosing the toppings for our cocoa.  

We always have such a silly and fun time together!  

This is Linda's first year joining in on the fun!  She made everyone a quilted ornament for the tree.  
Carol made some cute Buffalo checked mittens with a wooden snowflake and button attached.
Amy brought two kinds wooden bead ornaments that were strung on wire.  
Melissa made some deer ornaments using chipboard as the base.  


And Judy made some designer paper punched ornaments.


Tracy also made some pretty paper ornaments.  

And my contribution was these little quilted trees.

Every year we have such a good time.  We're already talking about what we can craft up for next Christmas!  

Do you participate in an ornament exchange?  Gather up some of your crafty friends and put one together for next year.  


Hanging the Stockings


I usually get the week before and after Christmas off from work and that's when I do a lot of my crafting.  This year I made this little shadow box for my daughter.  I got the Sweet Little Stockings stamp set because it had a cute cat and dog image that I thought would look great hanging from the fireplace in a stocking!  :)

My daughter has a cat, dog and of course, a baby, and I thought this would be so cute.  Don't they all look ready for Christmas hanging in their Christmas stockings?  LOL  I'm not totally sure that my daughter thought it was as cute as I did.  I think it's fun to try and put Stampin Up images into my crafting.

Tuesday, February 15, 2022

Quilted Tree Wall Hangings & Matching Ornaments

If you remember, I made a couple of these quilted Tree Wall Hangings last year for Christmas gifts.  The pattern is from The Fat Quarter Shop and is called Charming Christmas.  You can watch the video on how to make here.  

While I was home on Christmas break this year, I made four more of them to give out as gifts.  They are each a little bit different.  I used fabric from Fig Tree called Christmas Figs.  All of the colors coordinate so beautifully.  For the gifts, each recipient received the wall hanging and some matching ornaments for their tree.

I made some little birds, which were so much fun to make, and some patchwork squares from the leftover scraps.  It's hard to see in the photo, but they have gold cording on them for the hangers.

I made MORE of the quilted trees (a lot more!) and gave them out, as well.  I love giving out handmade ornaments to people.  People tell me years later that they still have them.  :)

The wall hangings measure about 22" square.  Will I make more of them?  Yes, yes, yes.  I'd like to try some different color schemes and see how they turn out.  It's a great Christmas gift and doesn't take too long to make.

Back in November, I had the idea to make some ornaments from my grandbaby's handprints.  I painted her little hands with some green paint, cut out some linen squares for the imprint and attempted to get her handprint on the fabrics.  Needless to say, it didn't work out very well!  LOL  She kept trying to grab the fabric and we ended up with green paint everywhere - on the table, her clothes, my clothes, etc.  

After we washed her up, we took off her socks and stamped her footprint instead.  These came out so much better!  Look at her little face in the photo- "What are we doing here, Nana?"  

This is what I came up with for an ornament.  I made patchwork strips to sew around the linen, matching the green paint that I had used.  After I sewed the front to the back, I added some red floss stitches, embroidered her name and added a couple of little buttons.  So sweet, right?  I made two of them, one to keep and one to give to my daughter for Christmas.  

Maybe next year we will try the handprint!


Snowman Thank You Cards

For my Christmas Thank You cards this year, I wanted to send out something with a snowman on it.  Funny thing is, once Christmas is over every year, I move right to spring cards, even in January.  So this year, I made a wintery card.

I think it's fun to take out old sets and make them "new" again.  So I used the snowman from Snow Much Fun set.  I wanted to put him into a wintery scene and started to go through some of my sets with background trees in them.  I finally ended up using an old goodie called Lovely as a Tree!  I haven't used this set in a long time, but I think it works perfectly for the setting for my snowman.  

I used Softly Falling embossing folder for the snow and an added snowbank with the die cut from Frosty Friends.  I had fun making them and love how they turned out.  

Do you like to mix old sets with new?  


Monday, February 14, 2022

Sunshine & Sunflowers


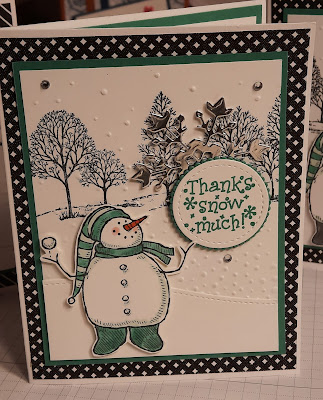
 I try to convince myself that every season has its own beauty.  What do I like about winter?  Well, you get a chance to stay in the house and catch up on your projects.  I love to work on some sewing projects and quilts during the winter months.  And I like to play around in my stamping room.  I'm not much for going outside in the winter anymore, but I do like the peaceful quiet of the season.

This year I decided to re-arrange three rooms of my house, moving my sewing room into the big spare bedroom over the garage.  Why am I sewing in such a tiny room when there is so much space not being used?  Ha ha.  Right?

So I am currently sitting in the middle of a mess!  There are sewing supplies everywhere, just waiting to get organized and moved to the my new sunny sewing "studio."  I'd hope to get it all done before spring, because it's winter right now and a good time to be getting things done in the house.  I'll keep you posted.  But don't hold your breath on me.  LOL

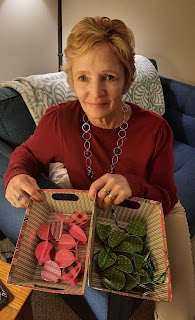
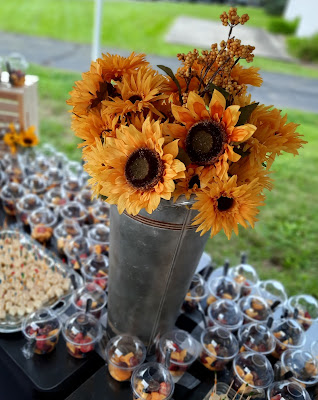
Anyway, back in fall I attended a fun women's gathering called Bloom.  The theme was sunflowers.  I love them; they're so bright and cheery.  They were everywhere, and they made me happy.  Here are some photos of me with my girlfriends.  (I am the 2nd one in on the first photo.)


Afterward I was so encouraged by all of the sunflowers, I decided to go home and make some sunflower cards.  

I've been wanting to use the Celebrate Sunflowers set for a long time.  For this card, I stamped the flowers in Crumb Cake and colored them in using the new chalks.  I added some sprigs and the pretty Bumblebee gingham ribbon to finish it off.  I love it's warm, sunshiny look.  The idea comes from Wendy Lee on Pinterest.

Next up, I focused on the sunflower cut out.  I added some pretty Love You Always dsp for the background.  And to me, it looked like a Sympathy card.  It's mostly monochromatic, but I like the peaceful look of this card.


For the third card, I stamped the sunflower image in Saffron all over the front of the card.  The card front is cut in the middle on a diagonal and then adhered to another card front, framing it.  In the center, I stamped the image.  I kind of like this offset look.  I got the idea from Sandra Schroeder.  For these three cards, I used Crumb Cake, So Saffron and Early Espresso colors.  


Lastly, I used the Tailored Tag punch to make this card.  I stamped out the shapes using Ornate Garden papers.  I chose these papers because of the pretty flowery images and colors.  The ladies loved making this card because it is so quick and easy.  Imagine it in different colors and papers.  There are so many possibilities.  :)


I guess even in the winter, we can find ways to "Bloom."  


Happy Valentine's!

This year it seemed like Valentines Day just crept up on me so quickly.  Maybe it was because the Super Bowl was yesterday and not the first week in February.  Last night I had some ladies over to do a little stamping for my Super Bowl Sunday Stamp-a-Thon.  :)  We made a lot of different cards.  

The card that I worked on was a Valentine card for my little g-baby.  Even though it might arrive a little bit late, I still want to send it out in the mail to her.  I used the Kangaroo and Company stamp set for the little kangaroo, hearts and mail.  

I put Wink of Stella on the hearts and on parts of the kangaroo.  It makes the whole card kind of sparkly.  :)


Saturday, February 12, 2022

Card for My G-Baby

A few weeks ago I made this little card for to send to my granddaughter.  I call her my g-baby, for short.  I remembered a very old stamp set that I had in the "archives" and stamped and colored some of the baby images for her card.  I used some pretty flowered paper from last year for the base of the card.  I wanted to let her know that I was very proud of all that she has accomplished this past half year.  Even though she can't read and doesn't really understand cards yet, hopefully her mom will save them for when she is older and she can look through them.  

I stamped "So Proud of You" from the Royal Peacock stamp set and put that on the inside of the card.  I didn't really seem to fit on the front, so it's perfect for the inside. 

I love how the card turned out.  There are more baby images that can crawl, walk and talk.  So I may take this set out again once she reaches those milestones.

Here is a recent pic of the two of us.  She is the happiest baby and hardly ever cries.  I just love her so much.  :)

I look forward to spending more time with her in 2022.  


Catching Butterflies

There are so many really cute stamp sets and papers in this year's Jan-Feb Sale-a-Bration catalog!  This is the little girl from Catching Butterflies.  Isn't she just so cute?  She looks a lot like some fairies that were in the catalog a couple of years ago.  I think she is just so sweet.

I used the Sunshine & Rainbows papers on her card to make it nice and bright.  I had to fussy cut the girl and the butterflies for this card, but it didn't take that long.  I colored her in with Stamping blends and added Wink of Stella to her dress, hair and the butterflies.  Even though you can't see it in the photos, she has a wonderful "sparkle" to her.  

You could also put balloon in her hand instead of the net, and make her card a birthday card.  If you cut her out, you can also make her a dancer or just a little girl in a scene.  What a cute image for a young girl's card! 


Starting the Year Off with Sunshine & Rainbows

I realize that I haven't posted anything in a while.  I'm not even sure where all of my time goes.  LOL  But today I'm sharing a Desk Calendar that I made using the Rainbow of Happiness stamp set and the Sunshine & Rainbows designer papers from the new Mini catalog.  I always start off each new stamping year with a desk calendar.  I just love the bright and happy papers in this paper collection.  I'm happy to be able to look at this little calendar all year. I ordered the mini calendars online.

For the coordinating card, I used Coastal Cabana for the card base and used the rainbow cut-out dies.  Surprisingly, even after all these years, I do not have a rainbow stamp set!  I'm not even sure why.  But I do love this one.  :)

The word "friend" is from the Well Said cut outs.  I think it looks so sweet on this card.  

And I love the colors.  I'm glad that the designers chose to use colors other than primary for the papers.  I love how this turned out.  Simple, fun and easy!  


Here's a variation of the card that I made using the same layout.  This time I used Bermuda Bay cardstock for the base and added "baby" for the greeting.  I made this card for my little grandbaby.  And seriously, she does really make me happy.  :)

I also added a couple of small clouds to fill in the blank space.  I love how that looks on this card, too.  Finally I colored some pearls with the Blenders so that they would match.  

Don't you just love this set?


Up next is a card using the negative space that the rainbow cut-out makes!  I used think white cardstock for the base, Perfectly pink for the next layer and then the pretty rainbow paper for the next.  

I cut out a small piece of rainbow strips to fit behind the cutout, then layered it to my card.  Afterward I added some cute little clouds, but they didn't make it into the photo.  

I cut the rainbow focal piece just the right size to also include the saying on it, "You make me happy."  Who wouldn't want to get this cheery rainbow card?

Lastly I made a little magnet with one of the cut-outs and added a saying.  You can see it next to the card.  I got the idea for that from Brian King.  

The rest of my cards ideas came from the Stampin Up catalog.

What do you think of my rainbow cards and projects?  They all make me happy.  :)