Monday, December 11, 2023

Angel Ornaments are Done!

This week is my annual Ornament Exchange with 7 of my crafty friends.  For my ornament, I made a little county angel.  I saw an idea on Pinterest, but changed mine up a bit.  

I made my own pattern for the angel and I used some coordinating fabrics.  Her hair is made from yarn that I braided for her face and then glued onto the back of her head.

I used a fabric pen to draw on her eyes and mouth and some pink Stampin Up ink to color in her cheeks.  

Originally I was going to make a fabric star to go with each angel, but the two projects took a lot longer to make than I planned on.  

I added some county-looking buttons that I've had in my craft for a long time (maybe decades!).  I think they look cute with this project.  For the wings, I made up a pattern, cut them out of some cream-colored felt and stitched around the edges.  I took up a little dart in the back to make them fit her body.  


Even though they were a lot of work, I still love them.  I hope the other girls love them, too.  :)


Friday, November 10, 2023

The Joy of Christmas

I was busy this week making some Christmas cards for my stamp classes.  Because of the broken foot situation, I'm way behind on my cards and classes.

For this set of cards I used the 2 stamp sets in the Joy of Christmas collection.  My first card is copied from Katie Drew and I just love the soft green colors.  I paired my cards this week with the Winter Meadow designer papers love the soft muted look to them.

Card #2 uses a larger sprig stamp from the Joy of Noel stamp set.  I colored the leaves and berries with Stamping blends and added a Pool Party focal circle.  The banners are 2" strips of paper from the Winter Meadow papers.  I used the same layout as Akiko Sudano did on one of her Christmas cards, but changed up the color scheme.

My next card is make using green papers from the Winter Meadow assortment.  My favorite paper in the pack is this subtle green tree paper.  I cut out some springs from the Joy of Noel dies and I think they look just like an evergreen branch.  The base of the card is Pool Party paired with Pretty Peacock accents.   

After I made the card, I thought it needed something else so I added the little bird from Bird's Eye Vew set.  He does make the card a little more whimsical, but I like him on there.  I wasn't sure if my stampers would like him on the card, but they did.  :)

The card on the left has the little bird sitting on the saying and on the right, he is on a little branch off to the side.  

I could have made more cards using this suite.  If only time would allow...


Beary Cute Christmas Cards

Last week for my stamp class, I made some "beary" cute cards for Christmas using the set, Beary Cute.  I used the designer paper as the highlight for this card.  I trimmed off part of the front of the card so that you can see the paper peeking through.  I stamped the snowflakes for the front panel and then added the bears to the focal point.  

I added some very light snowflakes using a grunge stamp to the background to help the polar bears stand out.  I got the idea for this card from Pinterest but can't find the demonstrator's name.  (If it's your card, please let me know so I can give the credit.)

For my second card, I cut out the background piece from the designer papers and added the bears and one of the trees to the card.  I embossed the white background piece using an older snowflake folder.  The saying is from a snowman set from a few years back.  

I added a snowflake cut from some blue glitter paper.  I like how it makes the card sparkle.  

This next card is made using Memories and More cards and envelopes.  I cut the card size down to 5 1/2" so that it is a standard US card size.  I adhered designer paper to the front of the card and a strip of blue glitter paper.  

I thought the bears were easy to stamp and cut out and looked great in the navy color.  I loved the designer papers, too.  This will definitely be a set that I will use again and again.  I want to mix and match it with other stamp sets.  

Which card is your favorite?


Quilted Zippered Bag

This week in my sewing lessons, I taught some of the ladies how to make a zippered bag.  Putting in zippers can be scary if you haven't done it before, but it's actually not that hard.  We cut our fabric into 2 1/4 inch strips.  For our bags today, we used 5 strips across but you can use any amount that you'd like.  

You quilt it with batting and backing and then put the zipper in at the top of the bag.  This is how mine turned out before I added the embellishments.  I made a couple of yo-yo flowers and added a tassel to the zipper pull.  

I am going to put together a tutorial on how to make this bag, hopefully this weekend.  I will keep you posted.  

This bag is made using fabric from the Folktale line from Moda.  I have quite a bit of this fabric and I love the soft, muted colors that are in it.  I made some key fobs to match the bag.  

And I paired it with the sweet little flower bowl.  I want to make a whole basket full of these little bags in a bunch of different sizes.  They are great way to get organized and also make a nice gift.  :)


Fall Fabric Basket

Fall is my favorite season of the year.  I love everything about it - the colors, the scents, pumpkins, Thanksgiving, pumpkin tea, squash soup and of course, the apple cider donuts!  I have a lot of orange fall fabrics and I wanted to make a patchwork fall basket.

I used a lot of fabrics from the Squirrely Girl collection and put together this fall fabric basket.  I donated it to my quilting guild because I'm in charge of the Opportunity drawings each month at our meetings.  Every month I include something handmade in the drawings.  

The woman who won the drawing loved the little basket.  Now I just want to make More!  


At the end of September this year I twisted and sprained my ankle and broke one of the bones in my foot tripping on the stairs.  So for the whole month of October, I was pretty much out of commission.  

During my time at home while my foot was healing, I tried taking some fall photos around the house.  Here is one that took in my room near the window.  It's not perfect but it's what I came up with.

A cup of fall tea in the morning alongside my Bible devotion reading.  :)


Once my foot got somewhat better, I did get to enjoy a lovely fall in nearby Lake George.  Although it's pretty cold here in upstate NY during the winter (6 months), fall is exceptionally beautiful.  I enjoyed a wonderful day with my friends looking at the foliage and sitting alongside the lake.

Here I am sitting and relaxing with my foot up wearing my fall crocheted poncho that I bought at the Cracker Barrel restaurant. When I saw it, I just had to buy it!  I love the retro look and I remember wearing a poncho similar to this when I was a girl in the 70's.  

Don't you just love it's pretty fall look?  

Now I'm off to make some Christmas items.  :)


Wednesday, October 18, 2023

Pumpkin Girl

Today I made two cards that feature a Pumpkin girl from the stamp set, Seasons of Fun, a set from a few years ago.  For Halloween this year, my g-baby will be dressing up like a pumpkin and I wanted to send her a fun Halloween card.

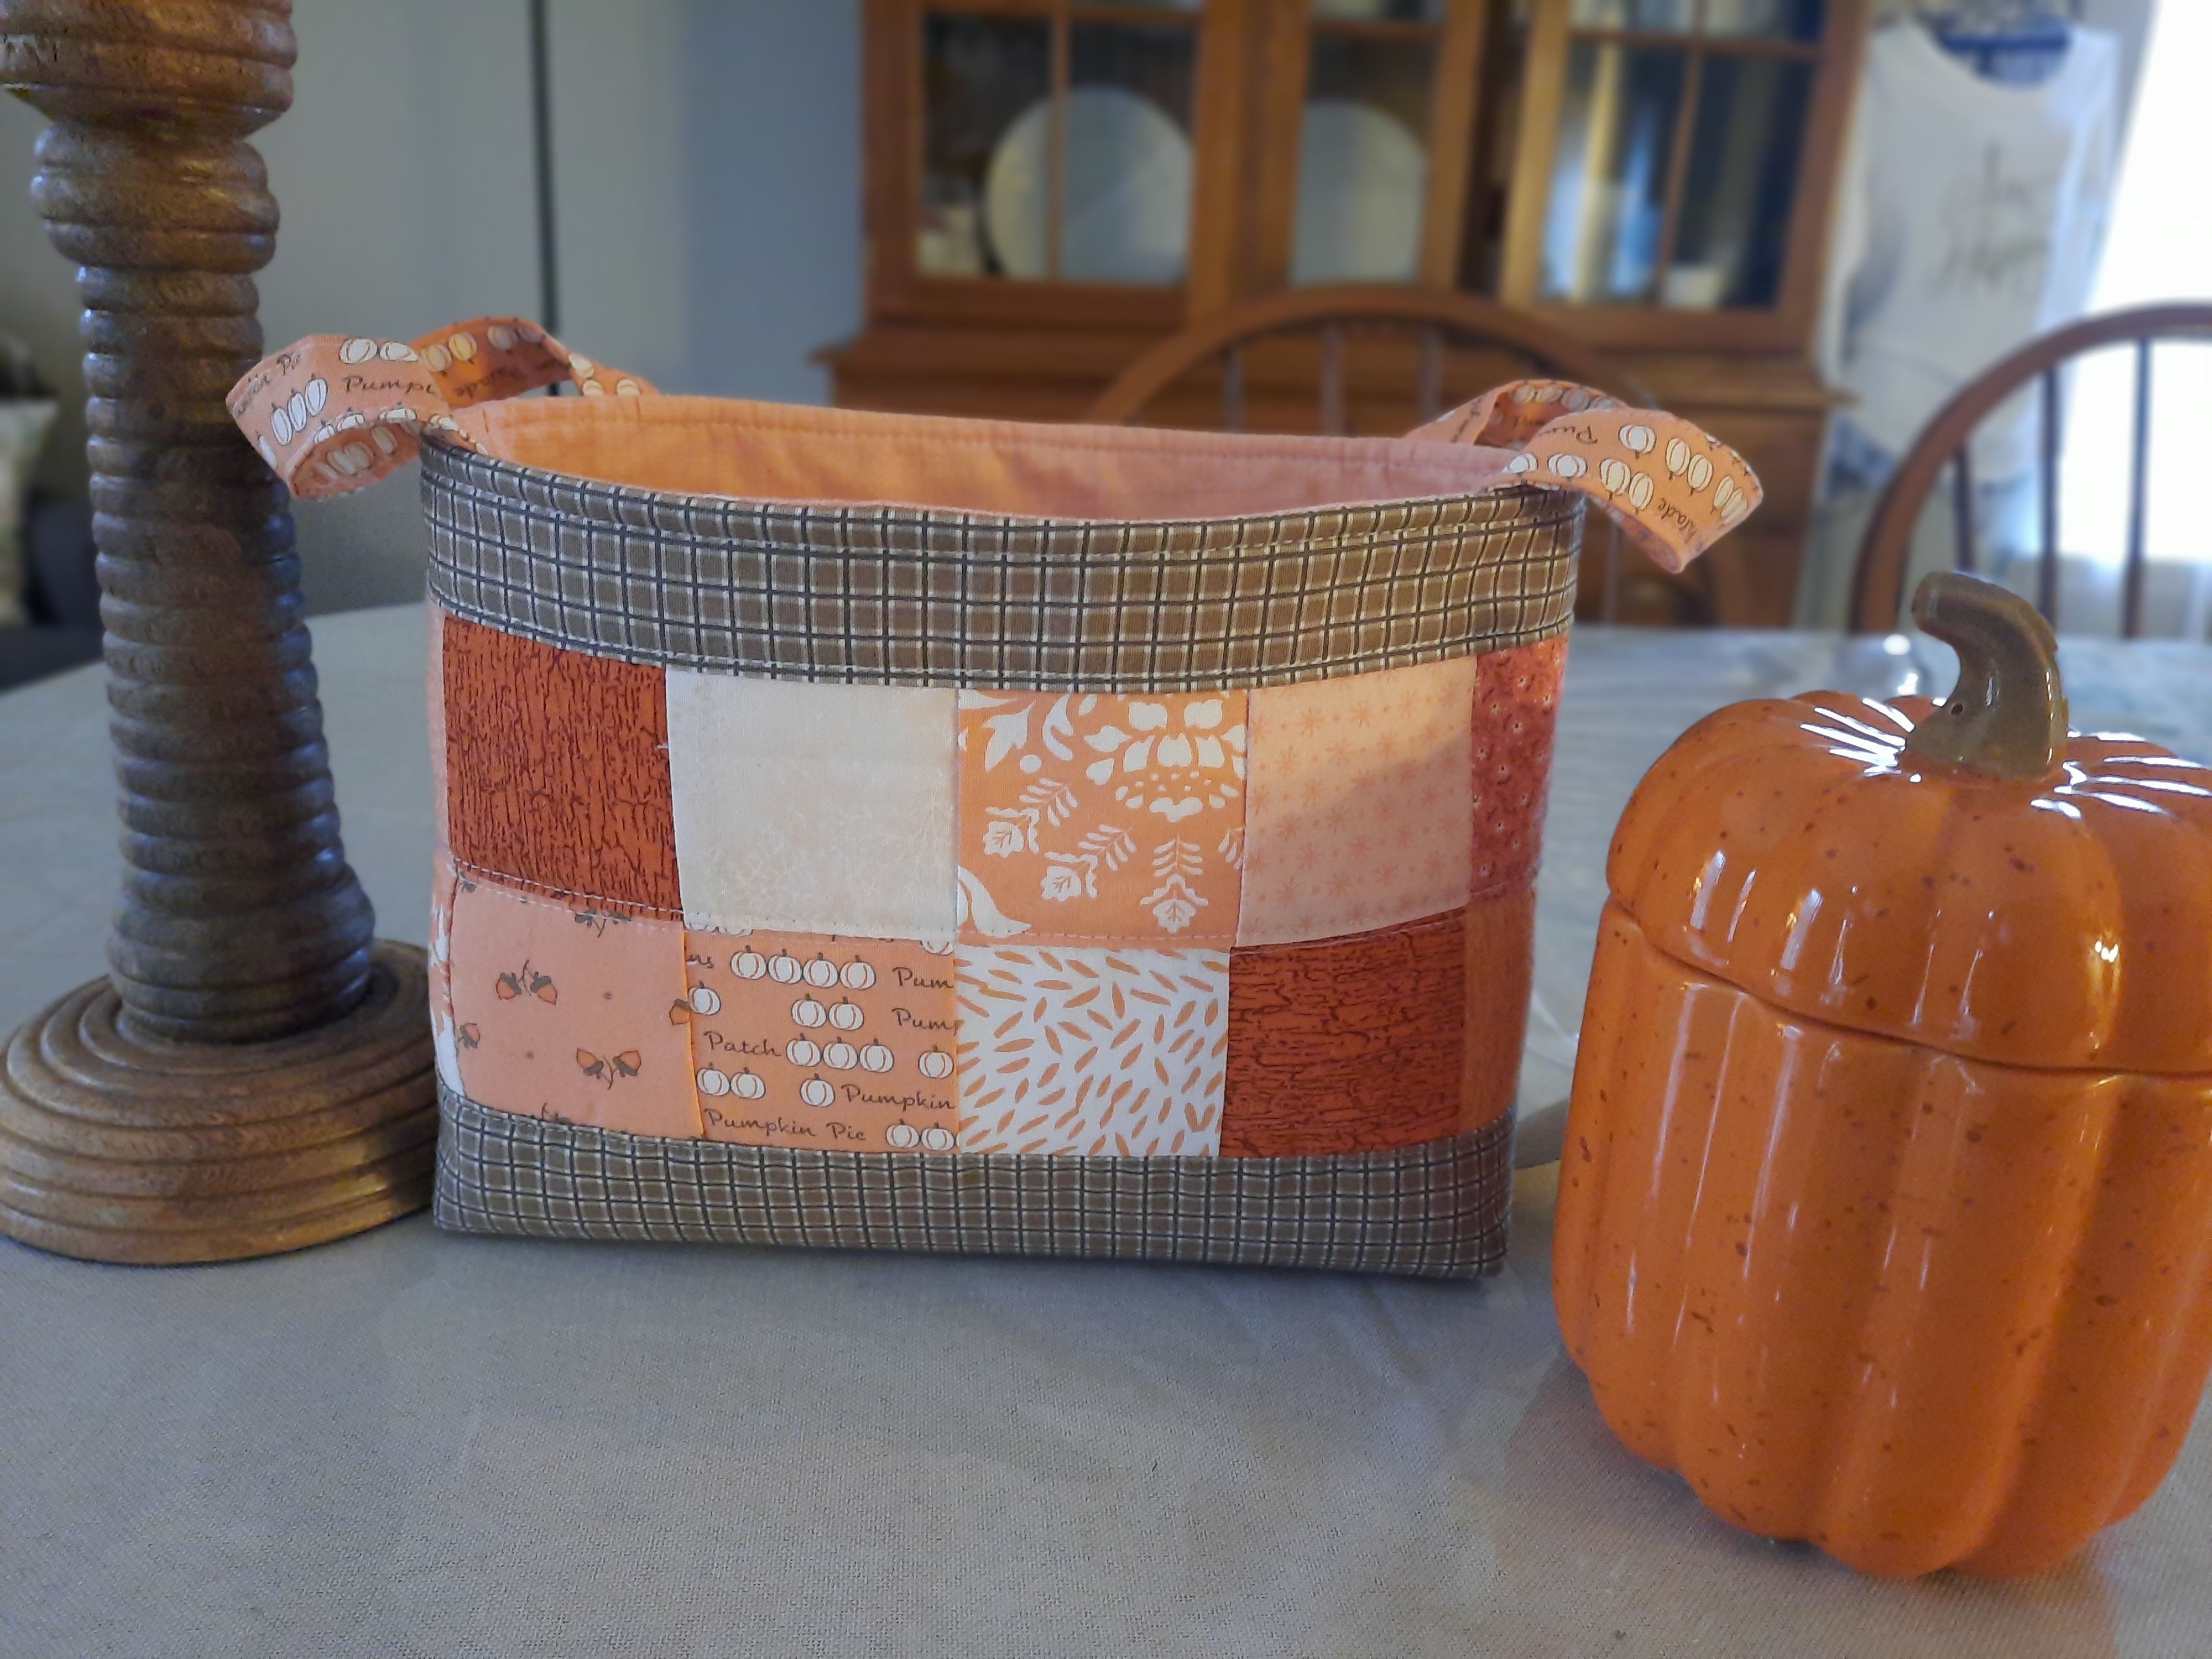
For this card, I used Copper Clay for the background cardstock and added some All About Autumn designer papers to it.  These papers have been out of stock for a while and I wish that had ordered more at the beginning of the season!  I just love them so much.  

I added the little Pumpkin girl, colored her in using Stamping Blends and Wink of Stella to make her shine.  I added the little dog from Seasons of Fun and some cut-out leaves for embellishment.  The saying is from Pick of the Patch stamp set, in the current Mini Catalog.  I think she looks so sweet skating across this card. :)

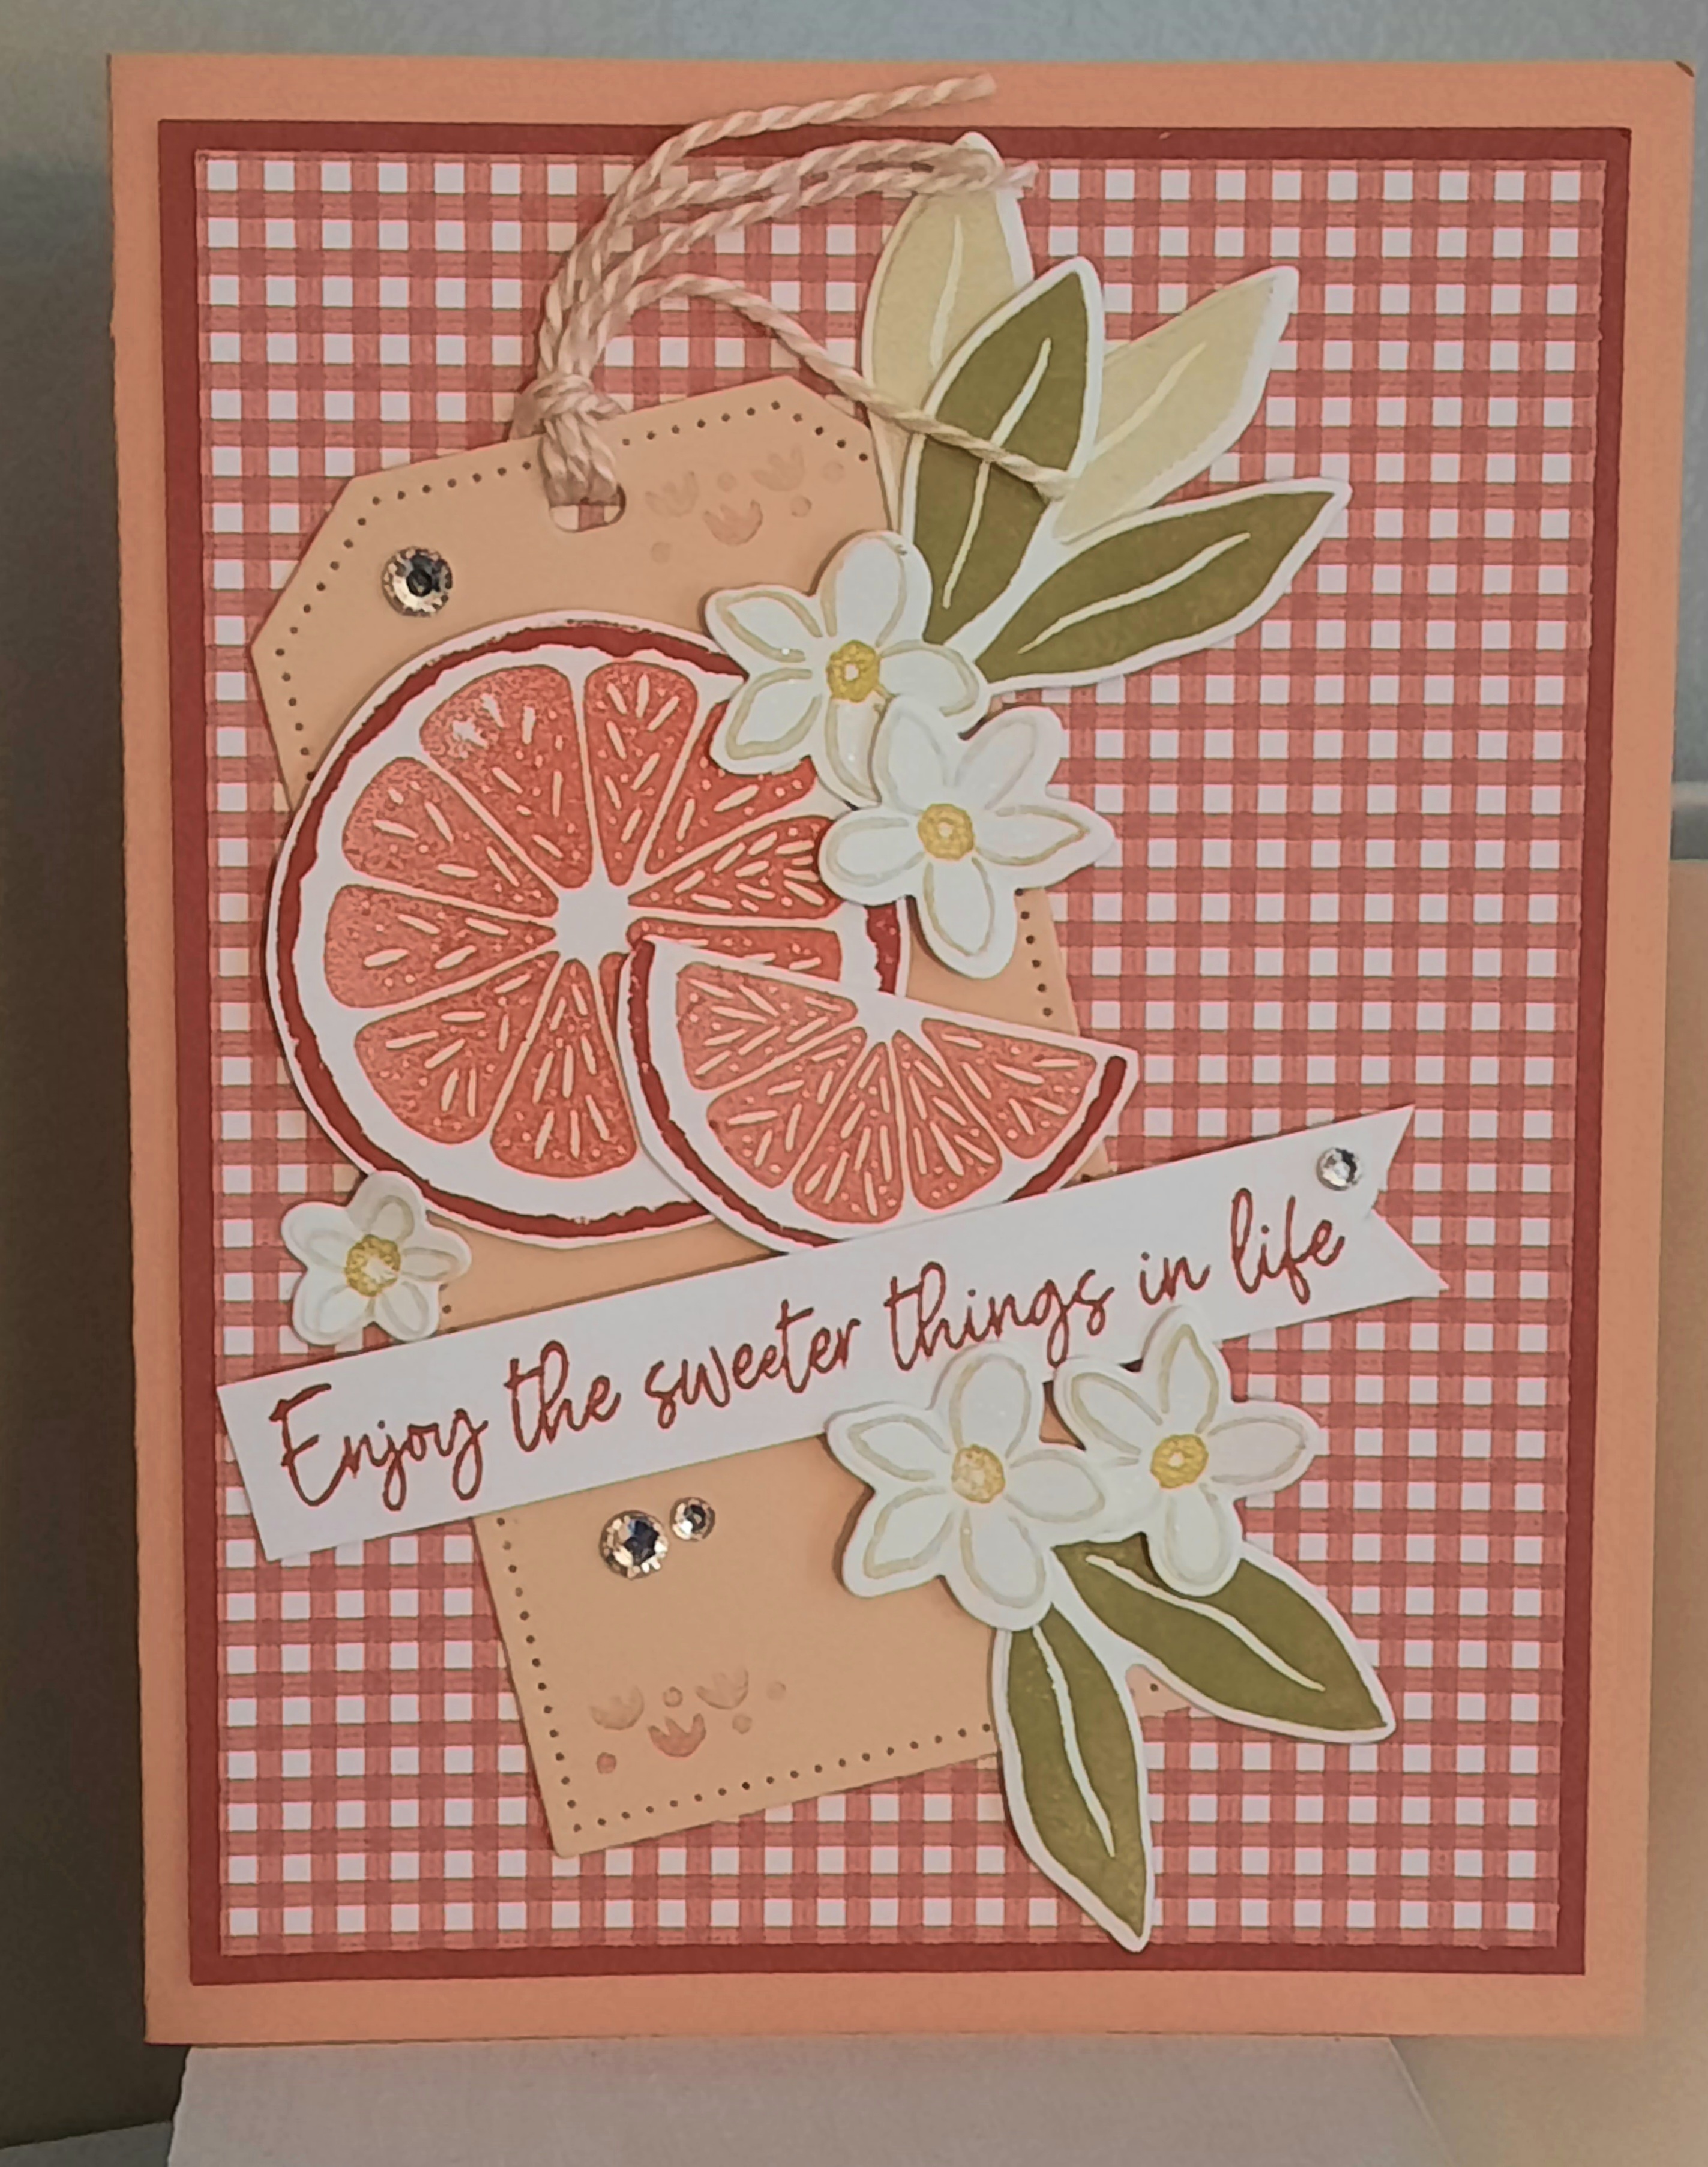
For my next card, I started with Pumpkin Pie cardstock and added a designer sheet from Let's Go Fishing papers.  I liked the addition of the new color, Pebbled Path and I cut out a couple of tags using the same two colors.  

This time, I cut out the image of the Pumpkin girl and added Happy Halloween and a little pumpkin from the Pick of the Patch set.  

Which of the two cards do you like best?  I had fun playing with some fall stamps and papers today.  


Tuesday, September 19, 2023

All About Autumn


 In this week's Stamp Class, I used the fall papers from All About Autumn.  They are so rich in color and so pretty featuring beautiful photos and gold-trimmed papers.  For this first card, I copied the idea from Mary Knabe.  I like the way the designer paper is sliced for the look of this card.  I added some rainbow trim die cuts in gold to add a bit more pizazz to the card.  I used gold sequin ribbon for the bow.

For the second card, I copied the idea from Mary Witt from Pinterest.  I love how the paper is cut into a circle for just a peak of the fall papers.  I added burlap ribbon and some leaf cut outs from Colorful Season dies.  The new Distressed Tile embossing folder is featured on the front layer.

This is the first time that I've used these new colors - Pecan Pie and Copper Clay.  I love their rich tones.  

For this Moody Mauve card, I cut 3 sheets of designer paper to make the collage background.  I found this card idea from Pattystamps.  The saying is from Painted Harvest, a set from a couple of years sgo.

And, last, but not least is this sweet little card that features a bird from Bird's Eye View set.  Doesn't he look great sitting on the bookshelf?  I want to give this card to a friend of mine who lends me books to read.  :)  I got this idea from Susan Molly.

When I ordered this paper, I didn't notice that it comes in 6" squares, so not enough paper to present an entire class.  I am waiting for it to come back in stock so that I can order some more!  It's great fall paper for your crafting needs.  


Crafting with Wood


 Last week I went to a friend's house where we continued to work on some painted wood items.  I love going there because she has lots of embellishments to add to the projects.  

For this little paddle, I added the bird using a Chalk Couture screen and brown paint.  I thought that he needed some color so I sponged in some color with Stampin Up ink and blending brushes.  I love the little hint of color that he has.

Then I added some soft-colored flowers, lace and sprigs to complete the look.  There are pearls and some berry sprigs if you look closely - all on top of a burlap bow.  I was pleased with how it all turned out.


Next I painted some Chalk Couture onto a small wooden tag that I painted white.  I added some lace, sprigs, a flower, jute rope to hang and a key charm to it.  It's about 3" tall and just a nice little piece to fill in on a shelf.

I started a few other projects but didn't get them done.  That will have to be another post!  

I love working with the soft colors of late summer and fall.  Last week I cleared off a couple of shelves in my stamping room and these items will look so good in there.  :)


The Tilda Collection

For the past couple of weeks I have been playing around using some of my Tilda fabrics.  I wanted to make a gift for one of my sewing friends for her birthday because I know that she loves fabric from the Tilda lines.  

I started out making some needlepoint cases and fussy cutting the ladies from one of my fabric pieces for the front of the case.  The back is patchwork and inside is some wool felt with embellishments on it.  I made four of them and love how they came out!  I saw the idea for these online.

Next I made some patchwork pincushions to match.  I had to order some purple buttons to complete all of the projects.  I like how they add to the cuteness factor.

After finishing them, I sewed some small zippered bags in the beautiful Tilda fabrics.  I added a small charm to the zipper pull and a little tab on them.  

Of course, I couldn't leave out the little birdies!  My friend has a whole collection of them and I knew that she would like one in the Tilda fabrics.  :)


I found a flower pattern on the internet and made some mug rugs to go with the collection.  You can drink your tea and while sewing and there's room for a cookie, too!  Or you can just dress up a table or shelf with them.

After the flowers, I put together some key fobs.  These are great for keys or anything that you can put on a ring.  I have some applique circles that I added to mine so that I don't lose them.  


Lastly, I made a couple of cards to match the set.  I gave one set to my friend Carol and raffled off a second set at my quilt guild.  The ladies there loved them, too!  

What do you think of my Tilda collection for sewing?  


Friday, September 8, 2023

Basket of Kitties

Don't you just love these little kitties?  They are a panel that I bought a couple of years ago called Woof, Woof, Meow cat panel by Stacy Iest Hsu.  There is another adult cat that I still have to make.  The set comes with the 4 kittens.  

I started making these kitties a year ago or so (ha ha) and found them in my sewing room.  Today I put together a small quilt for them to cuddle up with and hope to set them out for my granddaughter to play with.

I have a puppy dog panel and a second kitty panel to still complete.  I'm hoping by the time that I'm done that the whole basket is filled with cats and dogs galore!

The adult cats have a pouch to put the kittens in, but I think it needs extra fabric and a dart to make the pouch fit any of the babies.  You can see in the photo that the pouch is very tight.  

I will try something different for the next adult cat.  We'll see how it comes out.

I'll keep you posted on the progress.  


\
What do you think of the kitty family?  Do you have a little one that would like to play with them?


Friday, September 1, 2023

Mixing Old with New

Today I took out the old stamp set, Time with You.  It has cute vintage images on it from 2006.  And check out the saying, "On the open road of life, may happiness be your destination."  Sweet, right?

 Although I made this card a couple of months ago, I loved the vintage look of the girl mixed with the look of the Regency Park papers, and wanted to make more.  :)

For the cards, I used some various sayings and on this card, I chose another color of the designer papers.  I added some Wink of Stella to the girl to give her some shine.  You can't see it in the photo, but she sparkles as she's riding her bike!

I have a lot, a really lot, of the Regency Park papers left over from the spring catalog, so you may see more things made with it!  Stampin Up is running the mini catalogs for only 4 months now instead of 6 months and I just don't get time to use up all of the products.  I hope they go back to 6 months next year!

These girls look like they are riding their bikes on the road to happiness.  :)


Friday, August 25, 2023

Sweet Cirtus


 For my Stamping Class this week, I chose to use the Sweet Citrus stamp set and die cuts.  I like how the stamped images can be used to make oranges, lemons, limes, grapefruit and even coconuts!  

The fruits on my first card are supposed to look like Ruby Red grapefruits.  The tag is from Tailored Tags and to that I added the citrus images, some leaves and a few flowers.  

The photo looks a bit bleached out, but the card is really very colorful and bright.  Just so cute.  

Card #2 is an easy fancy fold card.  I started out with Lemon Lime cardstock and found some older gingham papers to match for the front of the card.

I used the Scalloped Contour dies for the focal point and then added some lime slices, leaves and flowers from the stamp set.  I stamped the saying, "Sending you a big squeeze" onto the white panel.

I like to embellish with rhinestones and for this card I found some old lemon lime flower accents that matched just perfectly with this card.  

It's another bright and easy card using the Sweet Citrus set.  :)


I got the idea for this Navy blue card from Yvonne Spikmans on Pinterest.  I love how different it is from what I usually tend to make!  I added a dry embossed piece of Navy blue cardstock to the front of the card and then white embossed the saying directly onto that.  Then I stamped and added more limes! Aren't they just so sweet?  (Get it - sweet?)   This time I stamped the little flowers in Navy blue and added the usual embellishments to complete the card. 

I love how it turned out.  The contrast of the Navy blue and the Lemon Lime colors really make the card pop.


 And last, but not least, I copied the coconut idea from Tami Hewlett from Pinterest.  First I embossed the white cardstock with the Citrus embossing folder and then sponged it with some teal ink.  I wanted it to have an ombre look to it, darker on one side and then getting lighter on the other.

For the white ribbon, I unraveled it a bit on the edges and then added the rinds of the citrus images.  I lightly painted the insides of the coconuts with a paintbrush.  I found that this technique worked better on glossy paper, so the fruit and flowers are stamped on that.

The green sprigs are from the Tropical Chic set that came out a few years ago.  

Are you loving the Sweet Citrus set after seeing my cards?  I loved using this set and thought that the images worked very well for my cards.  What do you think?  

To order the Sweet Citrus set, click here.