
This potholder is made with heat-resistant batting so it can actually be used in your kitchen. You don't have to worry about burning your hands! You can also put it on your dining table to keep hot dishes from ruining your tabletop.
The directions are for the small potholder. If you would like to make a larger one, you can find the measurements of your pieces at the end of the tutorial. Happy sewing!
Supply List
Here's what you need:

(1) 6" square of your main fabric for the background
(2) 6" x 2" strips of your border fabric
(2) 9" x 2" strips of your border fabric
(1) 11" square of fabric for the back of the potholder
(1) 11" square of stiff batting
(1) 11" square of Insul-Brite heat-resistant batting
Wonder Under for your applique pieces
scraps of assorted fabric for your applique pieces

Here's what the Wonder Under and Insul-Bright packaging looks like. I purchased mine in the section that has the interfacing on bolts but some stores offer it in packages.
The Applique Pieces
Let's start with cutting out and preparing the applique pieces.
1. Cut out your applique shapes.
2. Choose the fabric for each shape. Be sure to use colors that contrast the background square of your potholder so that they stand out.

3. Cut a piece of Wonder Under slightly smaller than the fabric pieces. (This is so that the sticky side doesn't stick to the bottom of your iron.)
4. Iron the Wonder Under to the back of your fabrics using a dry iron.


7. Peel the back of the Wonder Under away from the back of your applique pieces.

Making the Potholder Top
1. Take out your 6" square. Lay the 6" x 2" strip along the top and sew a 1/4" seam.
2. Lay the next 6" x 2" strip along the bottom and sew a 1/4" seam along that edge, too.
(For some reason, my photos are not showing the right side up. Sorry about that!)

3. Using an iron, press both seams away from the center square with an iron. This means that the edges of the seam will lay on the outer border on the back of your square.

4. This is what it should look like so far:

5. Now you are going to add the longer border strips to the side edges. Pin and sew 1/4" seam. The strips will be slightly longer than your piece. Don't worry, you will trim them off later.

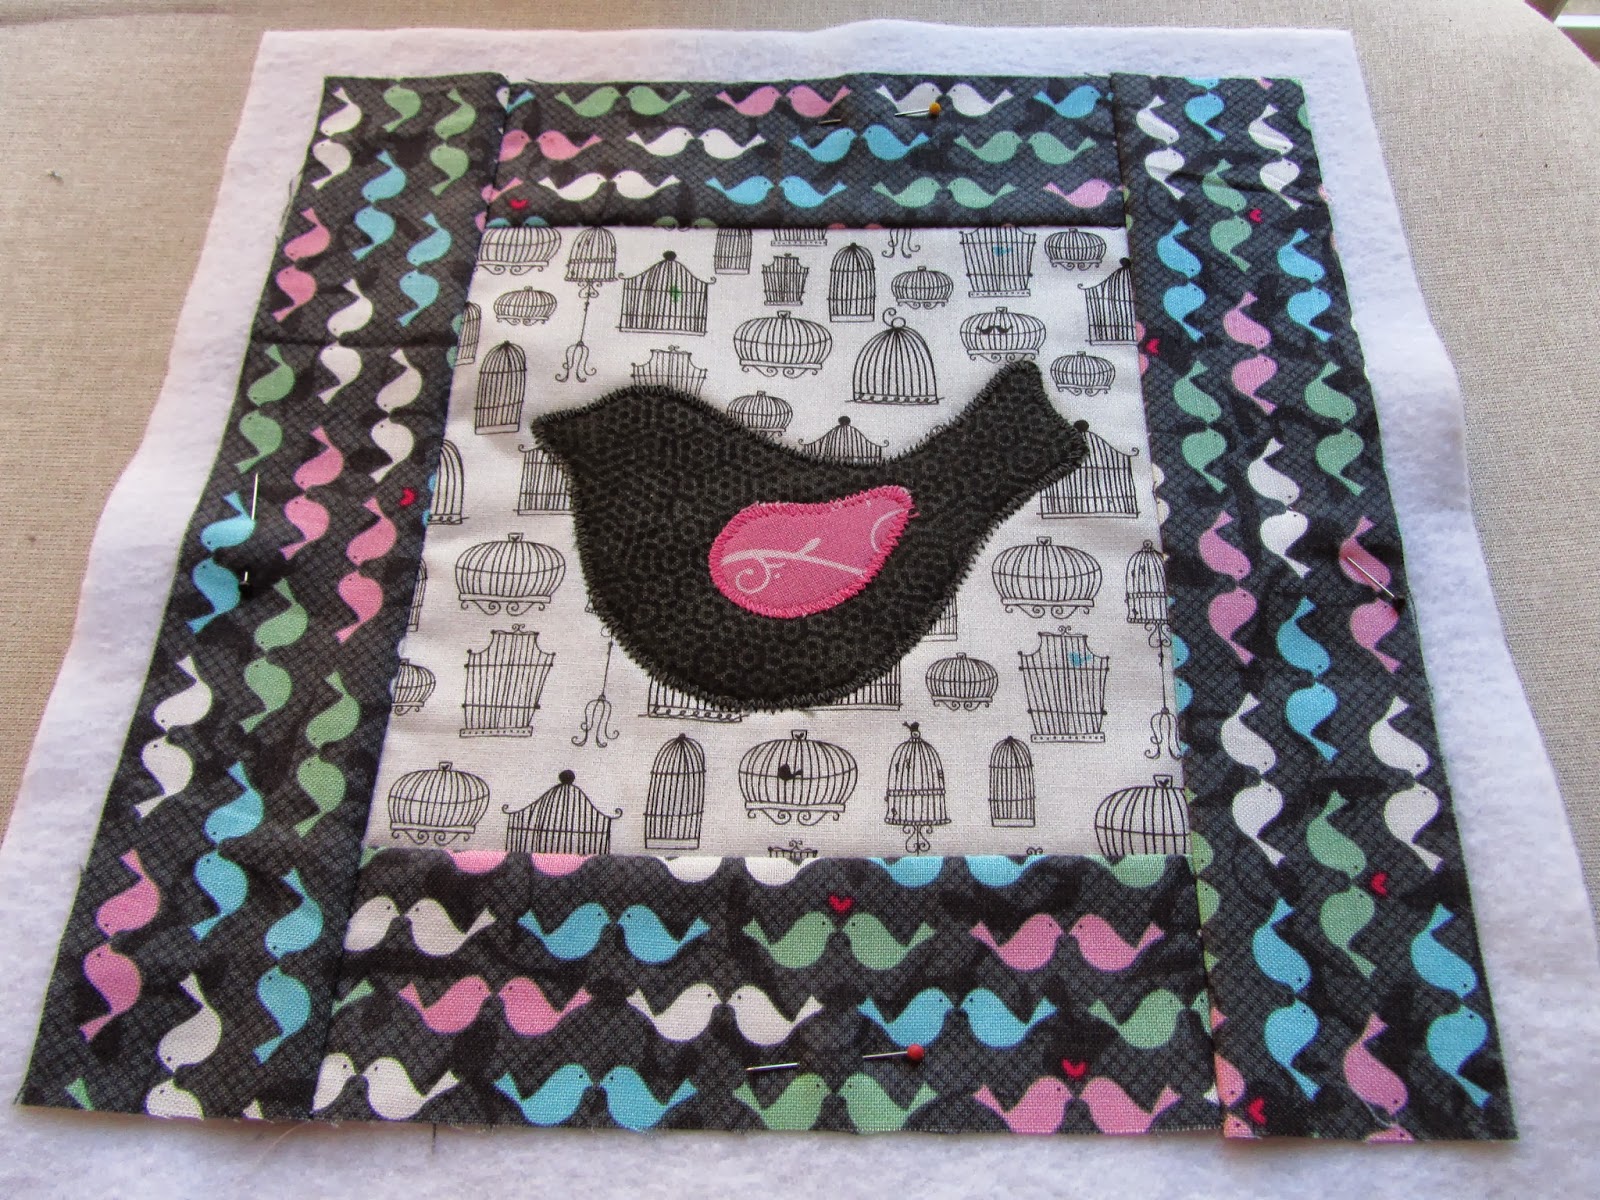
6. Add the final strip to the last side and sew 1/4" seam. With your iron, press the strips toward the outer edges, just like you did with the two top strips. Your piece should look like this:

7. Using your rotary cutter (or scissors if you don't have a rotary board and cutter), trim the extra pieces off of the sides like in the photos.


10. You are now ready to use a satin stitch from your sewing machine to finish off the edges of your applique pieces. I like to use a zig-zag stitch that is not very wide, but wide enough to catch the edges of your image. Play around with the length and width of your zig-zag on a scrap piece of fabric to get the width that you like. I am going to use pink and stitch on the wing first. Here is what my stitch looks like. (The stitch width in the right side of the photo is what I am using.)

11. Place your zig-zag right on the edge of your applique. Sew slowly, turning your applique a little at a time to get an even satin stitch around the edges of your image. I like to use matching thread for each image piece that I add.

12. Stitch around each piece of applique in your design.

Sewing it All Together!
1. How you layer your pieces in this next step is very important! (If you don't layer them correctly, you could end up with the inside pieces of batting on the outside of your potholder!)
Start by laying the Insul-Brite on your table first. Then add the back piece of your potholder with the right side of the fabric facing up next. See the photo for how this should look so far.

Now place the potholder top piece with your applique (the right side) down next. It should look like this:

2. Mark off about 3" along one of the sides. This is your opening for turning the piece after you have sewn it together. I usually place my opening about an inch up from one of the corners. Start sewing at one of the lines and sew around the top piece of batting about 1/4 inch from each edge, stopping at the final line. Backstitch a little at the start and stop lines.

3. Trim the bulk off of the corners, being careful not to snip the stitches.

4. Trim along the sides also, taking care not to trim too closely near your opening. You will need this fabric to stitch your seam closed after you turn.

5. Now you are going to turn the potholder inside out, carefully bringing each corner through the opening space.


8. You're almost there! Lastly, topstitch along the edge of the square. Then topstitch another row about 1/4" away from the square edges. This will give your potholder a finished look. You're done! Wasn't that easy? Take out your favorite recipe and bake something in the oven to break in your new potholder.

To make a slightly larger potholder, start with a 6 1/2" square of fabric for your center.
Cut your strips 6 1/2" x 2 1/2" for the top and bottom borders. Cut your strips 2 1/2" x 10" for the side strips. Make your batting and backing squares about 13" square. This size is great to use for trivets to set your hot plates onto the table.
No comments:
Post a Comment