Monday, July 18, 2022

Spending Time with Friends is Time Well Spent

Each year for my birthday, I try to think of a new place that my friends and I can go for the day.  This year we went to Fenimore Art Museum in Cooperstown.  Then we took a ride on the Glimmerglass Queen for a tour around Otsego Lake.  It was a beautiful and day and even more fun to spend it with some friends.  :)

For my Thank You cards this year, I chose to use the Happier Forest Friends suite in the new catalog.  I didn't really do any stamping; it's all just cutting out the animals from the designer papers.  I just love the little bear and his "friends."  

Each card came out a little differently, depending on what the scene looked like from the designer paper.  I love the colors of this suite, the whimsical look to the animals and how nicely they all came together.  For some of the cards, I cut out some trees from the cut outs to add to the scene and to have a place to put the little owl.


Thank you to all of my friends, for your gifts, time, friendship and love.  I enjoyed the luncheons, dinners, Van Gogh Experience and spending time with each of you.  :)


In the Venice display at the Museum

This painting looks so real!

Sailing on the "Queen"


I can't even wait to use this set again!  And even though it is very whimsical, it's not just for kids.  Maybe next time the bear will come "camping" with me.  


At the Lake and the Ocean


 Here is another card that I made using the Let's Set Sail stamp set.  For this card, I sponged the sky with the blender brushes and then added a piece of white cloud from the Basic Borders cut outs.  The sea is stamped over and over again using the sea stamp then cut out with a curvy stitched die from Frosty Friends.  

I unraveled the edge of the White Frayed ribbon to make the foam on the sea and then added the sailboat.  

You can see it a bit better in this photo.  I got the idea for this card from Tami Hewlett.  I stamped the Happy Birthday using white embossing powder onto a cut out piece of Pacific Point cardstock.  The sea, clouds and the foam-look from the ribbon give this card a nice sense of movement.  

For my final "sea" card, I used the Waves of Inspiration set.  I have to say that I wasn't too sure about his set when it first came out.  But after using it, I just love it!  I used the Stamparatus to stamp the wave and then added more color to it by sponging on darker blues and restamping it.  It's hard to tell in the photo, but the wave has some great dimension.  I added Wink of Stella to it and the wave just comes to life with the sea sparkle.


Here is another card using the same technique.  I ran the wave piece though the Subtle folder to give it more dimension.  I just love this card!


I got the idea for these cards from Jackie Bolhuis.  What do you think?  Do they remind you of the ocean?


Let's Set Sail

It's been a beautiful summer this year in upstate NY.  We've had lots of really nice days and weekends without rain.  And it makes me want to go to the Beach.  

For my cards today, I used the Let's Set Sail stamp set and punch.  I bought this set when I first saw it in the last mini catalog and I'm glad that it stayed around long enough to be in the regular catalog.  It's a really cute set that makes fun and easy cards!


To make the sailboat for these cards, I colored onto a piece of the Vellum Layering Designs paper using 3 colors of Stampin blends.  I left some white space, too, to give it more visual interest.  Them I punched out the vellum using the punch.  I also punched out the pieces with white cardstock and glued the vellum onto it to make it more stronger.  Don't you love the collage feel of the boat?  

The first card came out very "blue" so I switched out the background paper from Balmy Blue to Coastal Cabana to add some more color to the card.  For the third card, I punched out the vellum backwards, letting the boat sail in the opposite direction.  Pretty cool, huh?

I enjoyed making these sailboat cards.  Next time I'd like to try adding some reds to the sails to bring in more color.  I got the idea for this card from Cindybdesigns.  

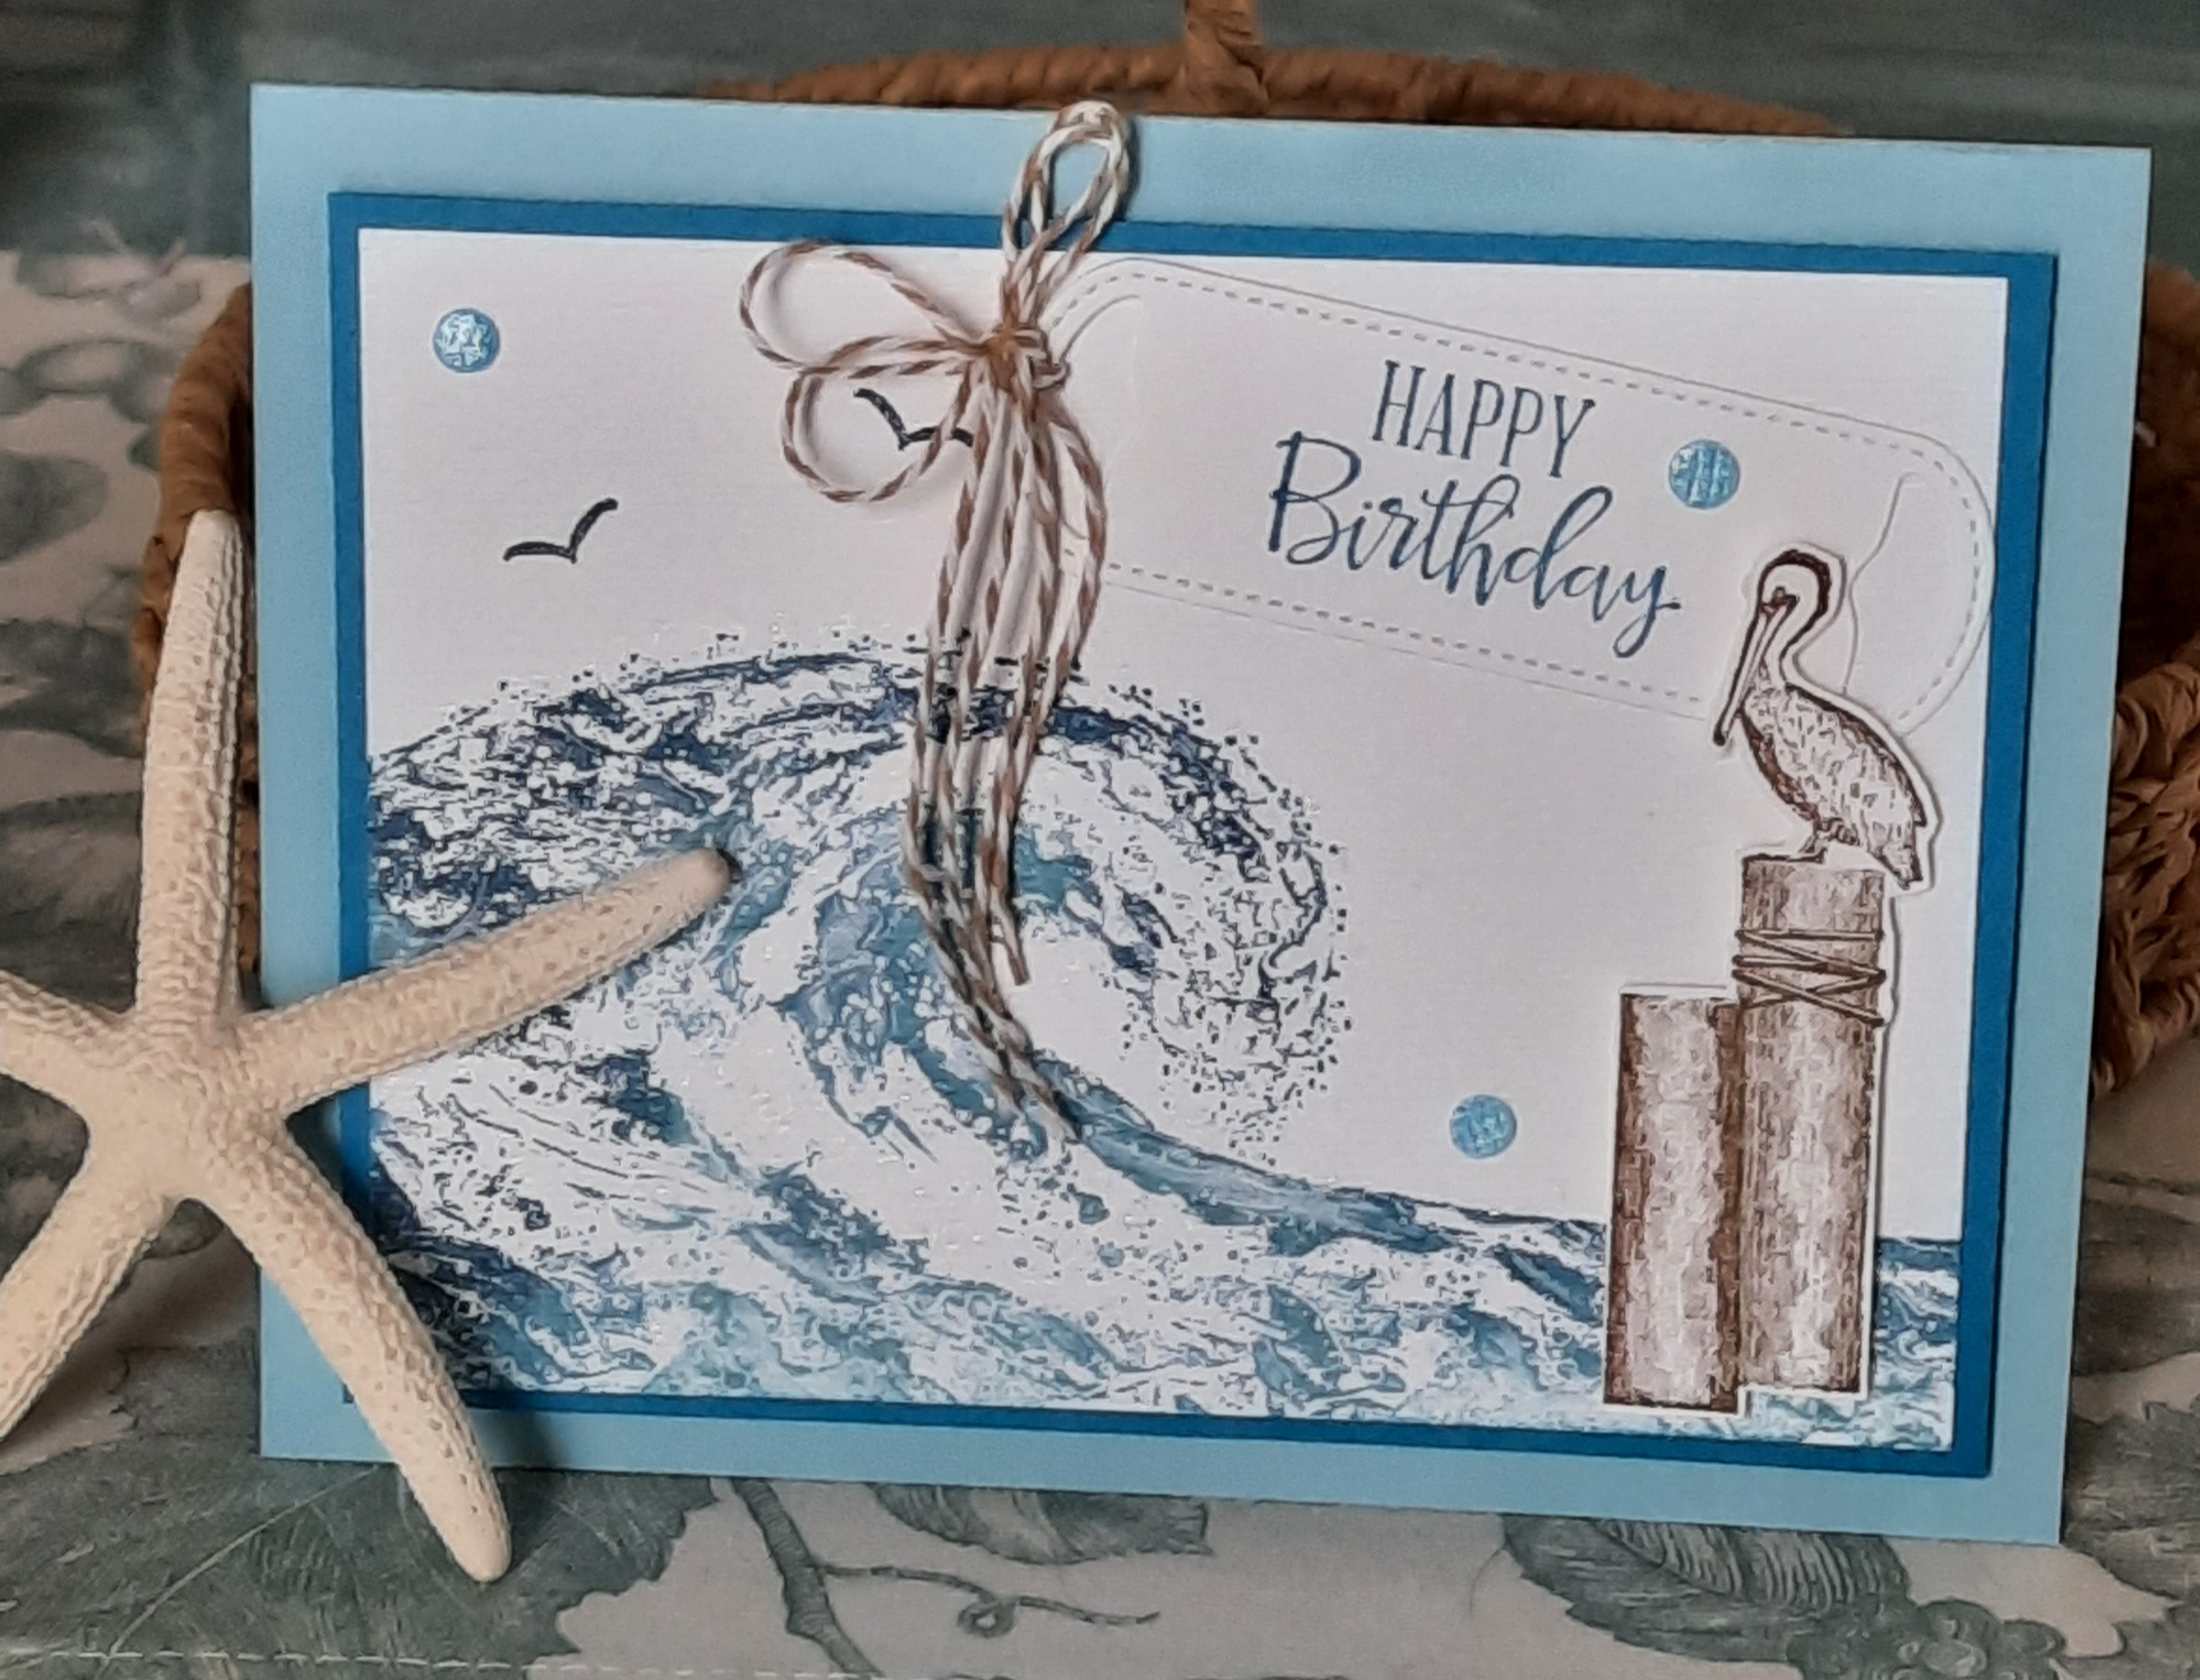
For this next card, I stamped the ocean stamp for the both the sky and the ocean.  I cut out the circle and framed it with a Misty Moonlight scallop.  The Crumb Cake strips are run through the Painted Texture embossing folder to give them a crinkled look.  I used the Timber folder for the white background and added some punched clouds that I sponged with some Balmy Blue ink. The cloud punch is from years ago.  

I used white embossing powders for the saying and cut out the pieces.  What a great card!  I got the idea for this from Mikeala Titheridge.  

I love how cohesive the colors are on the cards.  It reminds me of the sand and the water at the lake.  


What To Do With the Bear

Okay, I have to admit that sometimes I like some of the "weird" stamps that Stampin Up sells.  Because I have so many stamps to begin with, more flowers just doesn't do much for me anymore.  This bear happens to be one of the ones that I thought was different and a little bit quirky.  I loved him right from the beginning when he appeared in the last mini catalog!  

Looking on Pinterest, I have not found many samples at all using this set.  But finally I took him out this week and made a couple of cards using the Wildlife Wonder set.

Honestly, he stamped so well.  It's a great image and I'm looking forward to doing more things with him!  Here is the card that I made to go in my "masculine card" pile.  I got the layout from Glenda Calkins.  I used the In Good Taste designer papers for the background.  

After I made the bear card, I tried out the wolf.  He stamped so nicely, too.  This is such a nice wildlife set.  And it has a great font and sayings.  I am definitely going to try some more cards using it.  


What do you think of the bear?  I think he'd look good in a camping scene with a tent in the background!  In what ways would you use him?


Friday, July 1, 2022

Happy Hedgehogs

The little hedgehogs that we first saw in the mini catalog are just SO cute!  For this card, I paired them with the Happy Forest Friends designer papers.  I love the little toadstools and the toadstool paper.  So sweet!

For the next card, I used more papers from the Happy Forest Friends.  I added some pink edging and some hearts to give it a softer look.  I saw this layout idea from Jane Martin.  I just love these little guys.  

Card #3 uses the tree from the Happy Hedgehog set, so that I could show my stampers that you don't have to make a whimsical card using this set.  For the background, I used paper from the Pansy Petals papers.  I love the soft look of this card!  I got the idea from Ann Schach.  

There are so many ways to use this set.  I'm definitely going to be making some more.  :)