Saturday, November 29, 2014

The Quilted Tree Makes a Comeback

 You might recognize this little tree ornament that I designed last year.  I had started making about 20 of them but never finished them all.  Ha ha- you know that's the story of my life, at least in a crafting sense!

A couple of weeks ago, I put together (finished) some of my craft items to be a vendor in a local craft fair with one of my friends.  I was hoping to sell more than I did, but I think for my first time that I did okay. I got lots of new ideas on how to display my items for the next time.

After the craft fair, I put this little tree ornament in my Etsy shop to sell.  This morning I made my first Etsy sale- this little tree ornament!  I want to design similar ornaments to coordinate with the tree and make it a set but I haven't gotten to that yet!

Do you like this little tree ornament?  Yup, you guessed it, you can buy it in my Etsy shop.


Christmas in Traditional Colors


Finally, a Christmas card with some traditional red and green colors!  This card is made using the Nordic designer paper and Cheerful Christmas stamp set.

The little candy cane favor is made using the envelope punch board.  You can find the directions to make this card on Pootles' blog here.   It's quick and easy to make, no matter what my stamping students say!

One thing that I love to do is make favors and ornaments to match my cards.  Do you like to do that, too?


The Star is the Star!

Here is another sample of a Christmas card that I made using the Lost Lagoon color.  It's hard to tell from the photo, but the small silver star on the card is embossed with silver powder.  It gives a lovely shimmery look to the card.  Even the designer papers shimmer with a silver glossy sheen.  I copied the idea from Heidi Boos. 

The star ornament is made from Lagoon cardstock and embossed with white embossing poweders. It's made by adhering 4 stars together and adding a bead and ribbon before you glue it all together.  The Bright and Beautiful stamp set comes with a star framelit shape to cut it out.

This Star card uses the star cut-out as the background, letting the designer paper show through.  Then the star is embossed in silver and raised for dimension.  The white paper is dry embossed with the new stars folder and the embellishment stars are cut out using a punch with some silver glitter paper.  I got the idea from Angie Leach.

The stars cards and ornament were a big hit in my stamping classes.  I guess you could say this star is the star of the show!


Lost Lagoon is a Christmas Color?

Somehow this pretty aqua color, called Lost Lagoon, has made it into the Christmas color palate!  I paired it with a softer aqua, named Pool Party and added a dark brown Espresso for contrast.

The pines are stamped first in the Lagoon color and then embossed with white to give it some depth.  The pine cones add more dimension and the framed saying just gives it a simple finish.  I found the idea on Pinterest by Rambling Rose Studios.

I think this is one of my all-time favorite cards. I love the simplicity of the blues along with the simple saying of Christmas Wishes. Now if only the rest of the holiday planning was this easy!


Peace and Joy and a Little Vintage Bird

I've been working on some cards for Christmas and wanted to try a different color scheme.  This card looks kind of vintage to me and I like the colors even though they are not the traditional Christmas colors.  I copied the design by Barbara Meyer.

I thought that the card needed "something" to go with it, so I designed this little bird ornament.  I used a Sizzix die and some vintage papers, a little stamping, ribbon, accents and a tie to hang it from the tree.  The eye is a pearl that I colored with a Sharpie marker to match the color scheme.

I had so much fun designing the bird that I think I will make some more "friends" to go with him.  Stay posted!

Christmas Wishes

Today I am finishing up some Christmas cards to send to the seven missionary families that my church supports.  Every one in the congregation is asked to fill out a card for each of families and drop it in a box labeled to each of them.  Next week the church will send the box of greetings out to the different countries where they are living.  What a great way for them to feel remembered and loved during the Christmas season!

 I made this card last month for one of my classes and really like the colors and the peaceful saying.  So I chose this card to make and send to the families. (It was designed by Dawn Olchefski.)

Here is the magnet that I made to match the cards.  I decided to keep the same colors and theme going.

I pray and hope that the missionary families are blessed by their boxes of holiday greetings!

How about you, can you think of someone outside of your close family and friends that would love to receive a card? 


Saturday, November 15, 2014

A Sense of Time

Yesterday I worked on another framed project, this time helping a friend make one with a clock theme.  I used one of my favorite older sets, A Sense of Time, and added some vintage accents.

 I love the saying that is in this set: "An unhurried sense of time is in itself a form of wealth."  I guess I like it because I am a 'stop and smell the roses' kind of girl.  Even though I usually (always) wait until the last minute to get things done, I don't like to be in a rush!

It's hard to see the dimension in the photo, but the depth of the scrapbook frame makes it easy to add 3-D items, lace and small charms.  


What theme would you use for your frame if you were making one today? 


Wednesday, November 12, 2014

Christmas Frame

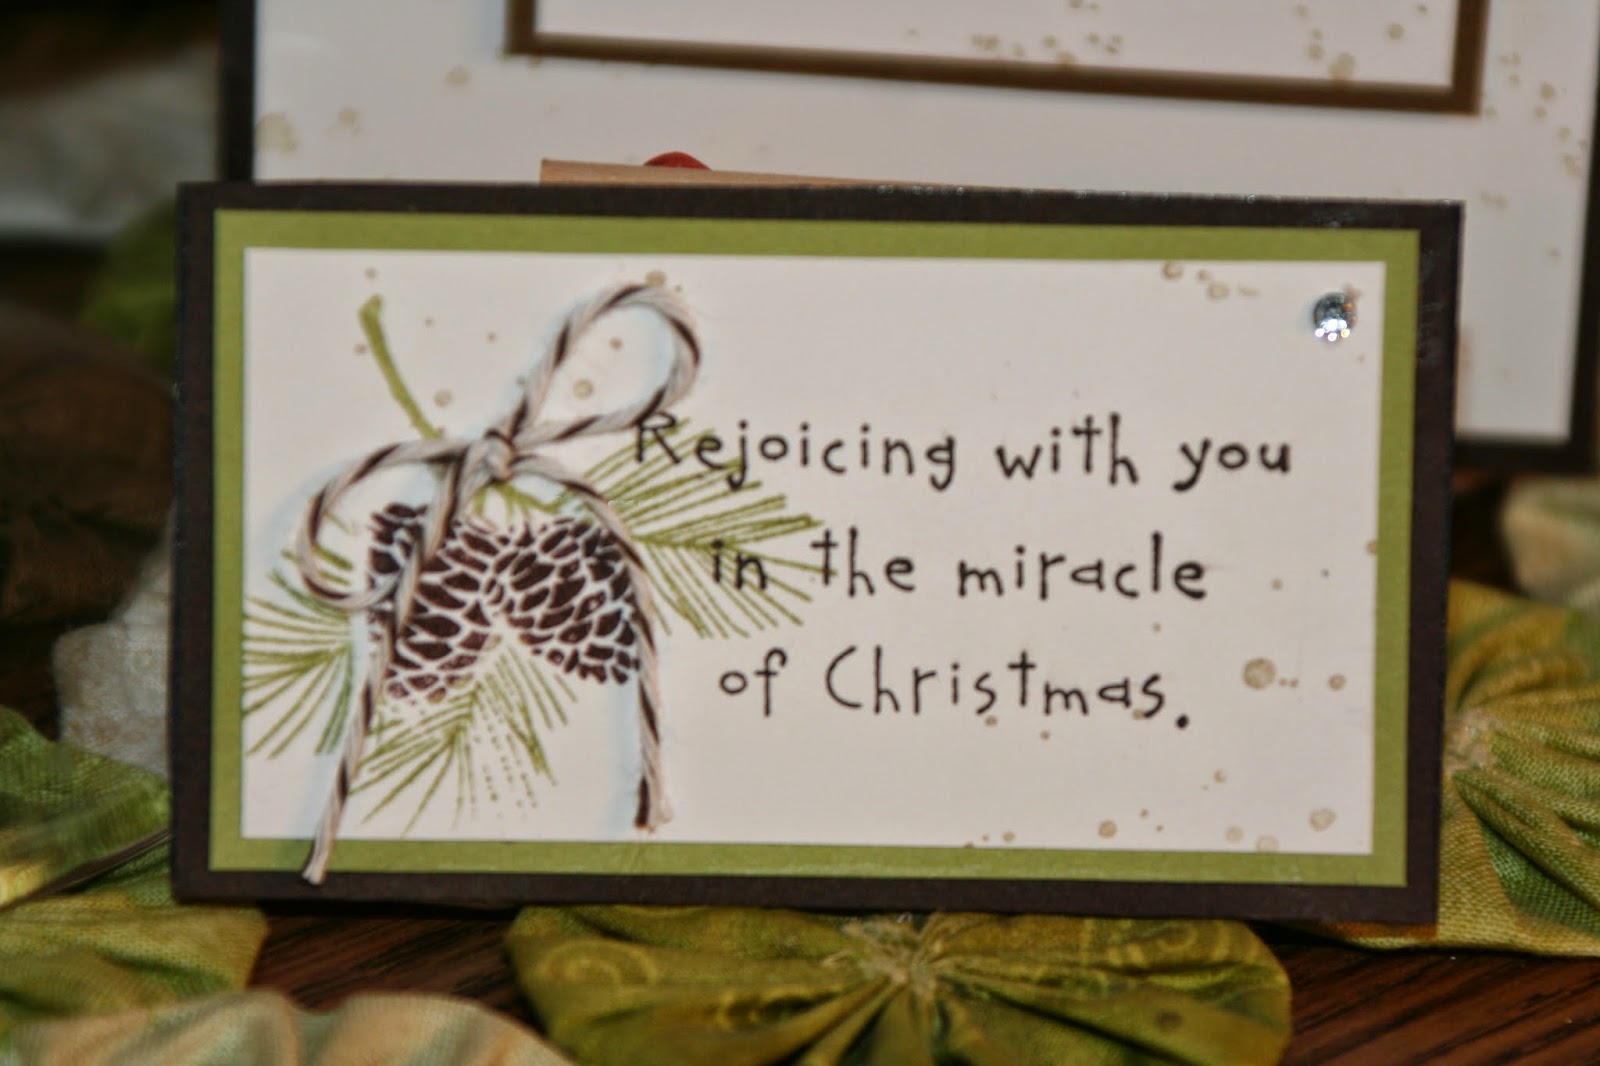
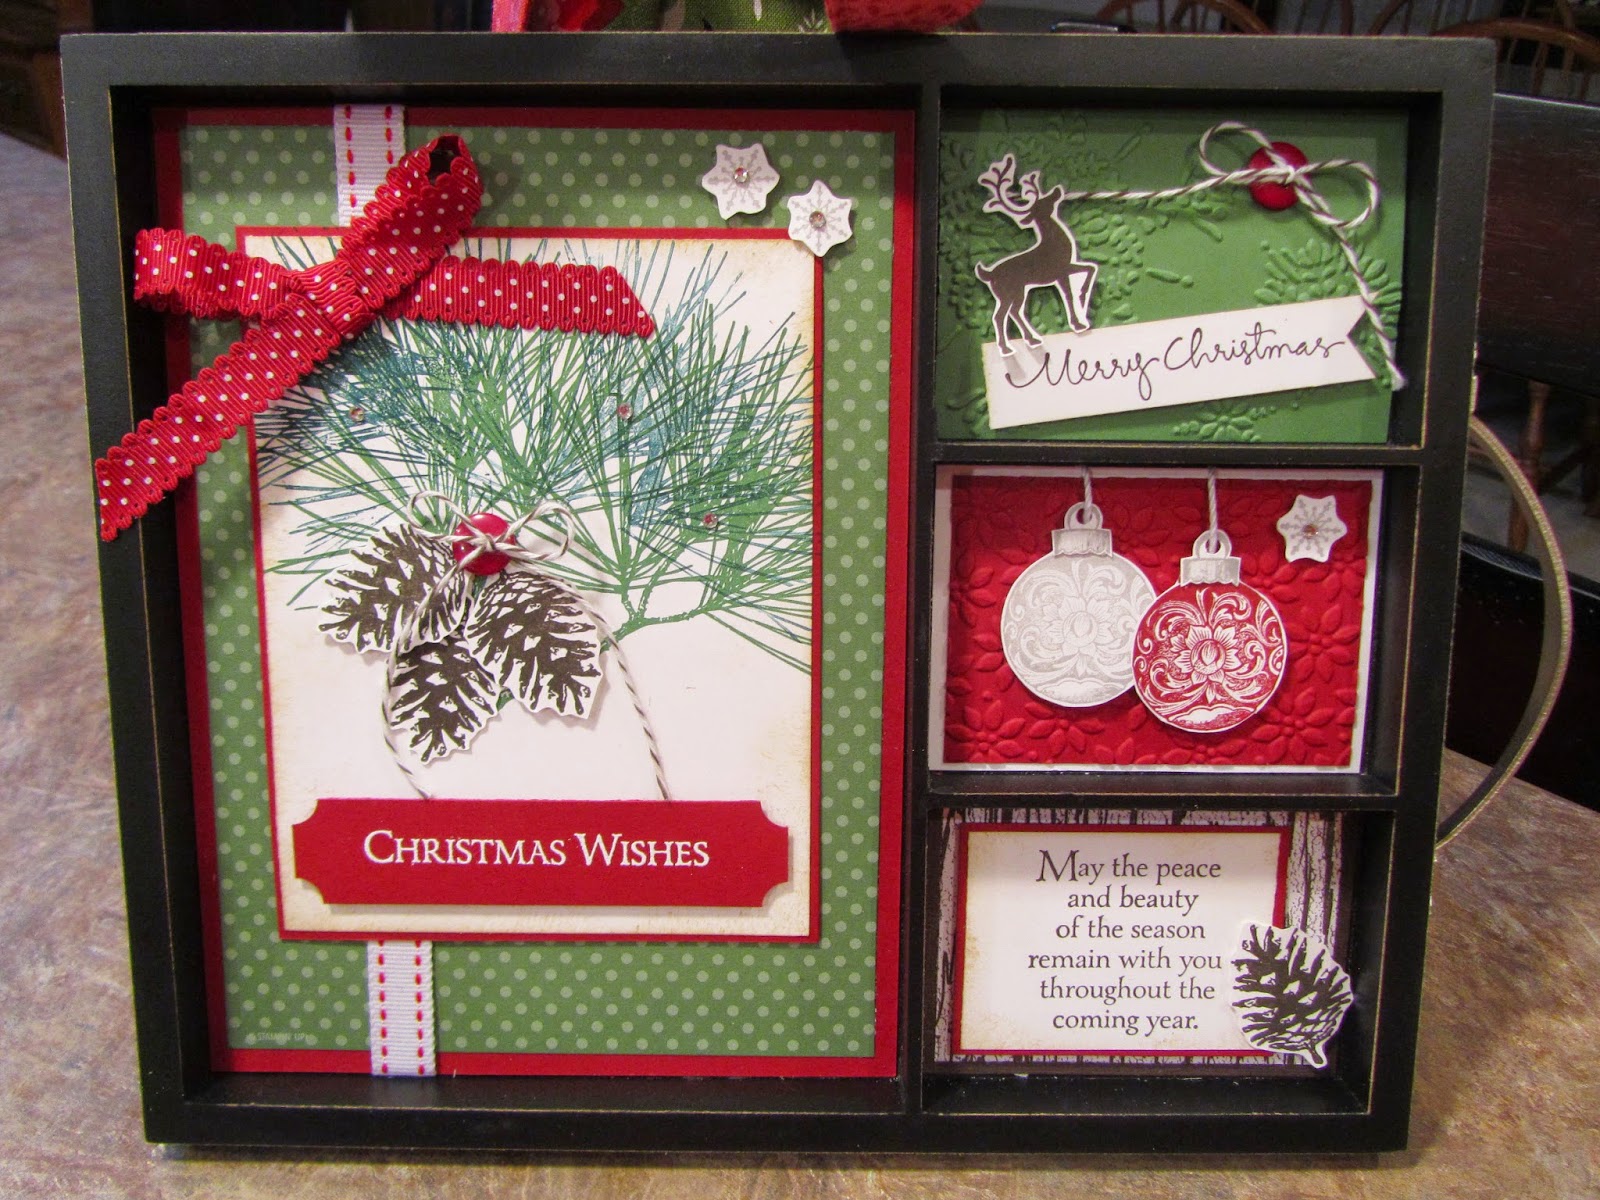
Remember all of those frames that I bought from Hobby Lobby last summer?  Well, I am finally using them!  I worked on this design today for a Christmas frame class.  We have been using the stamp set, Ornamental Pine a lot lately and it works up so nicely for the frames.

For the focal point, I started with the pines.  I stamped them in two different greens to give the pines some dimension.  The Christmas Wishes sign is embossed with white to make it stand out and the pinecones are raised using stamping dimensionals.  I saw the card idea on Pinterest by stampwithbrian.com and just added embellishments to turn it into a decorative frame.  

I love the saying that comes with set.  I think this is one of my favorite stamp sets from the holiday catalog.

I even added the little deer from one of last year's hostess sets to go along with the woodland look. Lastly I added some rhinestones to give the tree boughs and snowflakes some "sparkle."

What would you put in the frame for Christmas decor?