Saturday, July 25, 2015

Making Flowers

I've been wanting to make a "bouquet" of flowers for a while and this week I finally did it!  I love how they came out.  I used the Flower Shop stamp set that comes with a coordinating punch to make them, and they were quick and easy. 


To make the flower:  I stamped and punched three images for each flower.  I used a bone folder to soften and curl the edges of the petals.  For the top flower, I cut a slit to the middle and secured one of the petals behind the other to make it take shape.  Then I added a rhinestone to the center, and mounted it to the next flower layer with a glue dot.  The last layer is mounted with a dimensional to give it some lift. 

To attach the flower to the wire, I folded the floral wire about 1/2 inch and inserted it into a white circle that I punched and cut a slit in.  Then I taped the wire in the slit to secure it well and used glue dots to attach the circle to the back of the flower. 

For the tags, I used Merry Everything stamp set to make the base and decorated them with Tag Talk and Floral Wings.  You could use any tag or saying that you'd like. 

At the local craft shop, I picked up some floral wire and vases to make it all come together. 

I saw this example on Pinterest (my fav site) done by Margriet Tournier.  They make a lovely addition to your desk or can be given away as a thoughtful gesture to someone. 


The card that matches is made with the new Floral Wings hostess set. The idea is from Beth Beard.  It is meant to be given with the bouquet of flowers! 

The note card is made with the same stamp set, Floral Wings.  I cut out the vase and three of the flowers for some added dimension.  You can't see it from the photo, but I scored two lines on each side of the vase for texture.  I love the vase and can't wait to make something else with it.  The idea is from Susan Itell.  
Have you wanted to make flowers but haven't tried it yet?  Now is the time!  :)


Friday, July 3, 2015

Banner Triple Cats?

 Stampin' Up came out with a new punch that allows you to punch banners in three sizes; it's called the Banner Triple Punch.  It's one of those things that is a "must-have" if you like to make crafts.

I found the idea for this card on Pinterest (of course) from Holly Obier and thought that it was so cute!  The papers are punched with the banner punch and embossed to show texture that resembles fur.  The nose and eyes are made using the owl punch.  It's quick and easy to make, and oh, so much fun!

I'm giving this card to my daughter who loves cats.

Here is the same style card made with a gray background.  But after I made it I thought that the card needed a bit more color.  The pink background makes the "kitties" stand out better.

Here's another card with the pink background.  So cute, right?

PS- Did you happen to notice the kitty photo bomb on the first card?


Saturday, June 20, 2015

Cute Tote with Cards

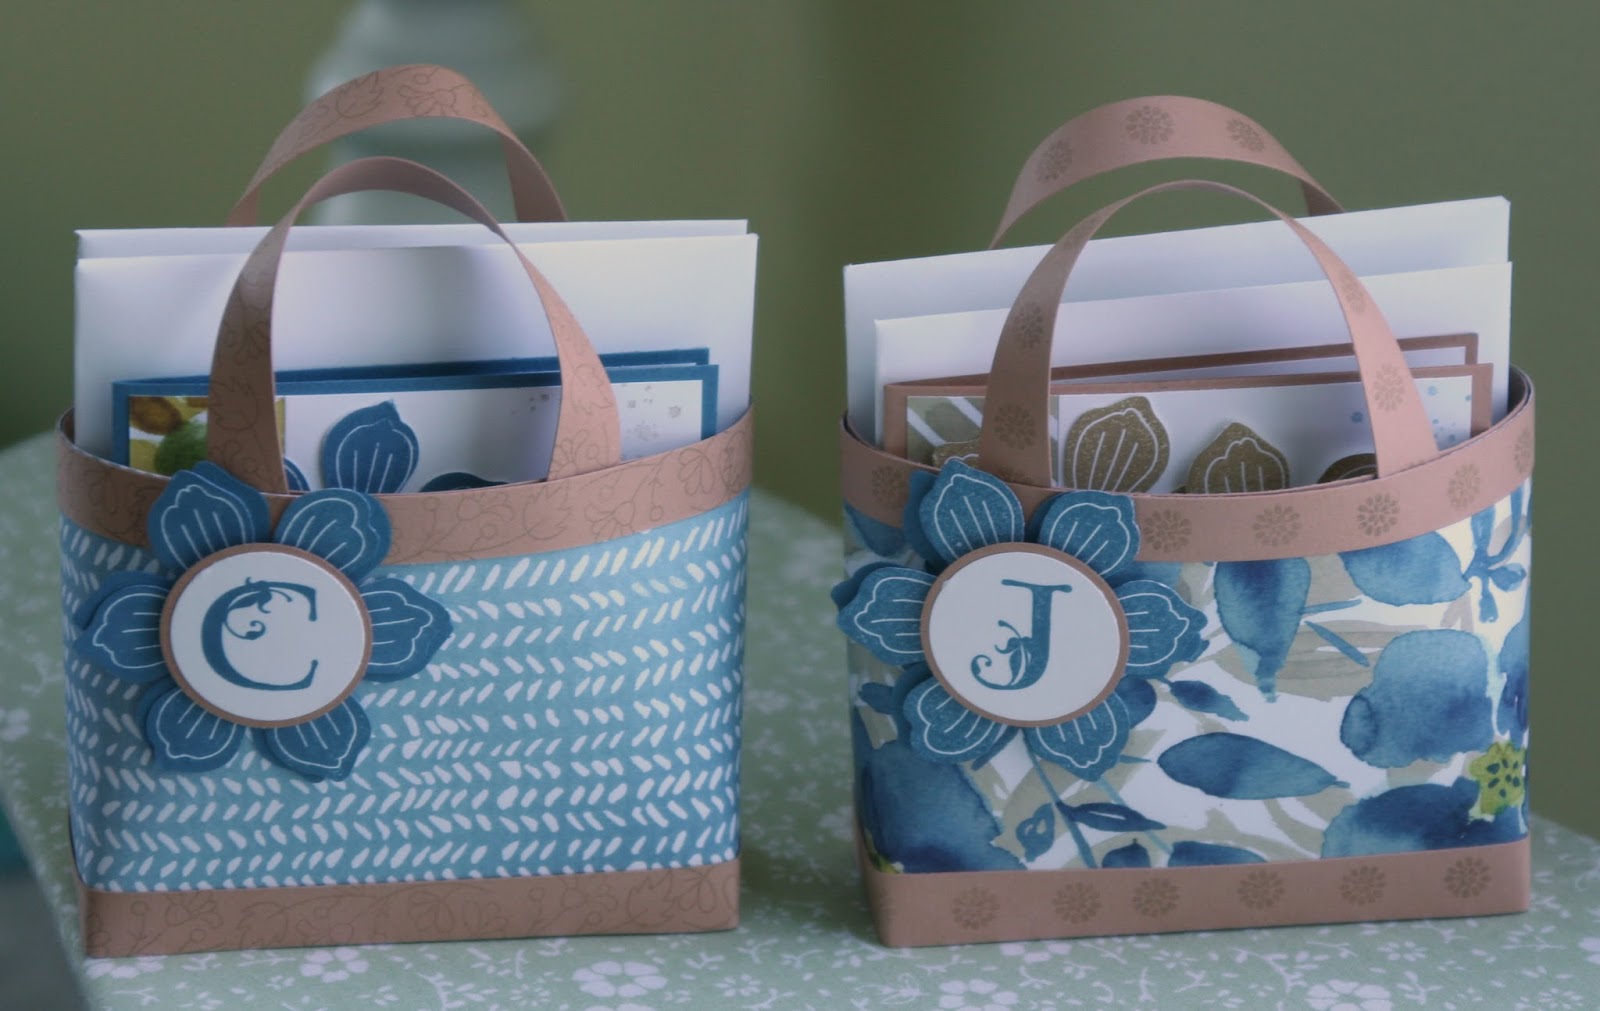
I was browsing around on Pinterest the other day and came across this adorable little tote with matching note cards in it.  I just knew that I would have to make it!  The totes are made with the new English Garden designer paper.  They are not hard to make at all.  If I had more time, I would have made LOTS more using these pretty papers.

 Here are the cards that I made to match the first tote bag. I used the Bloom for You stamp with the coordinating Fun Flower punch for quick and easy flower accents.  Using the envelope punch board, I made matching 4 x 4" envelopes, too. They are a fun project to work on and a nice little gift to give to someone special. 

By the time I got to the second tote bag, I decided that the note cards didn't need two flowers to make them look pretty, so I only added one flower to each of the cards in this set. 

We made these totes with the cards sets in my last stamping class and everyone enjoyed making them!  Here is the link to the video pattern if you'd like to make one, too.  Let me know how your totes come out. 


Thursday, June 18, 2015

It's Time for the New Catalog!

 Most of you know that one of my obsessions hobbies is rubber stamping.  June is when Stampin' Up puts out their new catalog and it's always so much fun to look at what new products are offered.

This year for my New Catalog Kick-Off party, we made small muslin bags that you can use to put a small gift, treat or a gift card into for easy gift-giving.  You can see from the photo that I made my sample bag similar to the one in the catalog.

All of the ladies loved making the muslin gift bags.  They each used different stamps and colors and all of the bags came out great.

One of the stamp sets that I thought was cute is the new Sprinkles of Life.  With this set, you can make cupcakes, ice cream cones, trees and clouds- all from the same stamps!  And there's even a punch to punch out some of the images - stamps that coordinate with punches are my favorite!

I got the idea for this card from the Stampin' Up blog.  Of course I changed it a bit to make it my own.  I even added some glitter to the "ice cream" to highlight it.  I love the colors on this card. 

When you buy the Sprinkles of Life set, $3 is donated to the Ronald McDonald House charities.  So not only can you be creative, but you are helping people, too!

What are your favorites new products from the new catalog? 


Money Speaks

I wasn't sure what to give my son for his birthday, so I made the "present" into a card!  I got the idea from Jill Hilliard on Pinterest (of course) and thought that it was a cute idea.  I hope that he likes it. 

I wish that I had moved the "candles" more toward the middle of the card, because when I was done adhering them, there was a lot of blank space near the right of the card!  So I added some buttons to fill it in! 

What do you do to fill in the empty spaces on your projects or cards?  My stamping friends know that I don't like to start over!


Wednesday, June 10, 2015

Happy New Home


Just recently my oldest son bought his first house.  I wanted to give him a little something to welcome him into his new home.  I looked on the internet for a saying that goes well on a "first-home craft" that I could put into a small frame.

Don't you love this saying that I found by Ethan W Post - "May your home know joy, each room hold laughter and every window be open to possibilities?" I printed it onto some cardstock and came up with this cute little framed project to give to him.

Of course, I made him a card and a little magnet for the fridge to match!  The colors in his new house are mostly grays with some pops of green.  I'm sure it will look great. 

I used the house image from the Sale-a-bration set, You Brighten My Day.  It's just the right size to put on a little something.  I stamped the 3 hearts from the same set and cut them out to decorate the front of the house. The trees are from Life in the Forest and the kitty is from an older stamp set. 

He doesn't have a cat right now, but everyone in my family loves cats.  So I put a little kitty next to the house in one of the spaces in the shadow box frame.  The kitty looks like he wants to go in!  :)  Who knows, he might find a sweet little pet to love.


Saturday, May 2, 2015

Gift for Teacher

 This week one of my sewing friends wanted to come up with an idea for a little gift to give to her children's teachers as an end-of-year thank you. She thought an apple-shaped coaster would be just perfect for the teachers to use on their desks for their coffee mugs.

 So I found a pattern for an apple and made this little coaster!  I sewed two fabrics together and then quilted the top piece with thin batting underneath.  Then I cut out the apple shape, added a backing fabric and a thermal batting piece to the inside.  I inserted the jute rope for the stem before I sewed it all together.  Then I turned it right-side out and stitched around the edge, closing up the opening for turning.

I made a fabric leaf and attached it with a small flat button.  To complete the project, I added a little stamping tag complete with an apple!

The gift is all ready to go!